Although turning a normal truss into an attic truss isn’t as simple as it may appear, townhouse loft conversions have grown very popular in recent years. A typical property can gain value by adding a loft conversion.
Converting your truss rafters is a terrific method to restructure your attic space to maximize it, whether you need more living space or want to increase the value of your home. One of the most economical home upgrades you can undertake is to convert underutilized space into living space.
Attics and basements are two of the most apparent areas. This is more complicated than it ever was with the truss roof design of today.
Table of Contents
When Should You Alter Roof Trusses For An Attic Room?
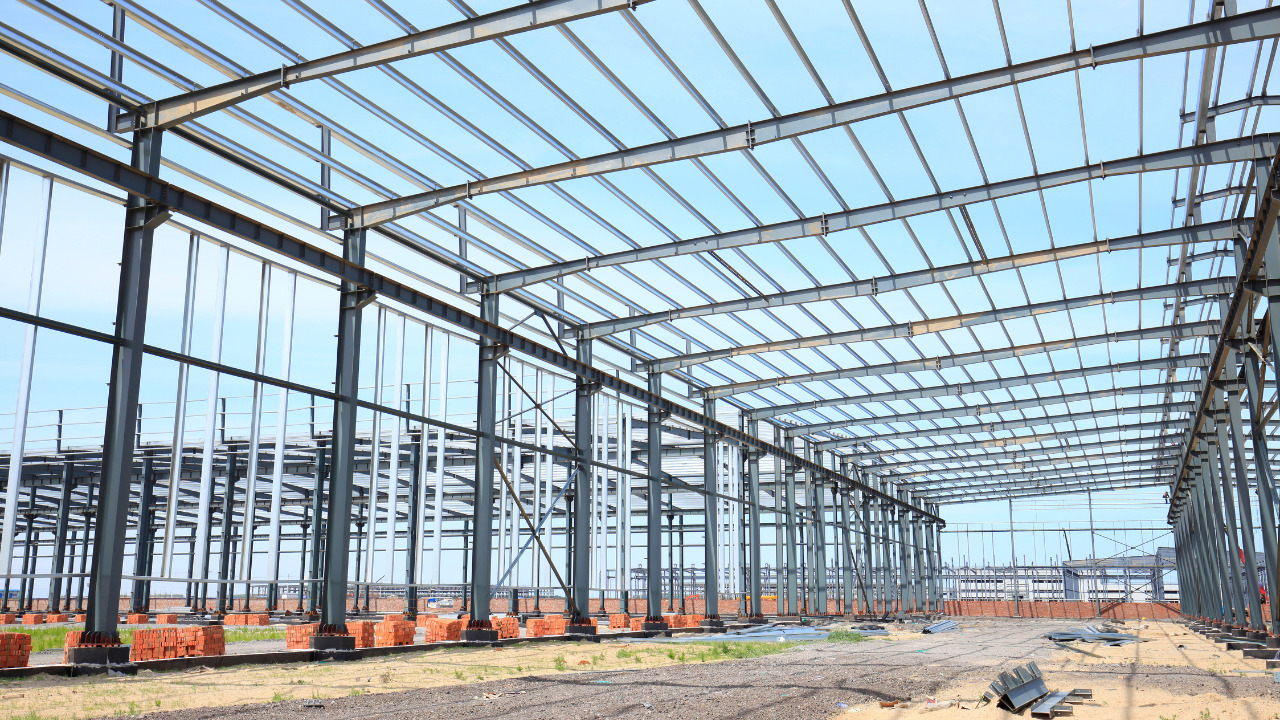
The W-shaped support system on the trussed roof is divided into triangular pieces intended to increase the roof’s strength. The trussed roof typically excludes possible living space because of its broad structure and inexpensive cost of materials and assembly.
However, because there are no timbers in the truss’s middle, attic trusses offer a lot of open attic space at the bottom. The issue is that replacing the complete truss construction is required to convert the loft.
This may not only jeopardize the structure of your roof but also occasionally call for planning clearance. There cannot be an open attic space beneath the roof due to the W-shaped trusses support of the loft floor and ceiling structure by diagonal bracing.
It is imperative to replace them with horizontal steel beams that offer adequate structural strength for the entire construction because removing them is not a safe alternative.
Things To Consider Before Altering Roof Truss For An Attic Room
You’ll probably run into several myths about framing and trusses while trying to learn everything there is to know about trusses. One common argument is that framing is less expensive than trusses. This claim is untrue.
Both techniques have been used to construct the same houses close to one another at various times. Trusses were always the most economical choice when one of the houses was being constructed. Another is that stick framing might be faster than trusses, according to some sources.
Fortunately, when comparing the construction of two homes side by side, trusses are faster than ever.
Steps To Alter A Roof Truss For An Attic Room
Measure Roof Truss
The breadth of your roof trusses should be measured from inside to inside. Take a measurement inward from the lower border of the roof to a truss point on either side of the attic. Draw a line from one end of the attic to the other on both sides using a chalk line parallel to the roof’s lower edge.
Measure The Truss Chords
Use a plumb bob on a string to locate the point on your trusses’ upper cords or rafters directly above the line. Till it stops moving, dangle the bob over the line at one end of the attic with the string resting against the bottom edge of the rafter.
Once the bob is still and directly over the line, adjust it as necessary. Mark the bottom of the rafter and the floor along the line where the bob will be. Also, mark where the top of the string will be on the bottom of the rafter.
From the two places, take a measurement. Your pony wall will be this high. Repeat the plumbing process at the ends of the two lines in each attic corner.
Measure Roof Angle
Use an angle finder, pressing the hinge on the inside of the roof peak and placing one leg against each face to ascertain the roof’s angle. Utilize the finder’s center indicator to determine the angle. Get each face’s pitch by multiplying this number by two.
Cut sufficient boards to stud both floor lines in a pony wall. Cut the top ends of these studs at an angle parallel to the roof pitch so that the long-metered portion is shorter than the height of the pony wall from step two.
Use Framing Nails For Rafters
At each end of your line, on both sides of the attic, snap a line with the chalk line along the faces of the rafters in the space between the two lines you created for the top of the string. Place the top edge of each nail on the line and nail along it.
Apply two framing nails from a framing gun to each rafter. To begin, lean up against one roof’s interior. Cutting a piece to fit at the end, however, the ends of the pieces up to the one before. For the opposite side, repeat.
Two nails in each stud, through the long board and into the end. Place the studs so that they are equidistant from the longboard and the middle of the attic, with the long edge of the miter against the floor.
Nail The Ends To The Rafters
Mark the center support of each joist and measure up from the floor. Mark them horizontally straight using a rafter square. Use a circular saw to cut each support off at this point. To get the bottom end loose, use a hammer.
Use a reciprocating saw to remove any diagonal braces from the truss. As with the pony wall studs, cut the ends at the same angle. Attach the center support with an angled nail to the top edge of the horizontal brace after attaching them to the rafters.
The process of reframing is now complete. Your attic is now prepared for completion.