Renovating your kitchen or simply upgrading an old faucet is a rewarding and practical DIY project that can breathe new life into your kitchen space. Replacing a faucet may appear difficult, but with the right equipment and a little patience, most homeowners can do the work. This article will teach you how to change kitchen faucets and help you ensure a successful and leak-free installation.
Table of Contents
Useful Tools Needed to Change Kitchen Faucets
The following tools are needed to change kitchen faucets:
- Adjustable Wrench
- New Kitchen Sink Faucet
- Cover Plate (if needed)
- Plumbers Tape
- Cleaning Cloth
- Bucket or Container
- Screwdriver (if required)
- Pipe Wrench (optional)
- Safety Glasses (optional but recommended)
9 Simple Steps to Change the Kitchen Faucet

Homeowners prefer to install a new kitchen faucet instead of repairing the old one. However, fixing an old faucet with the right tools (mentioned above) and practice is easier. You can complete the job within a few minutes and without putting too much effort. Follow these steps:
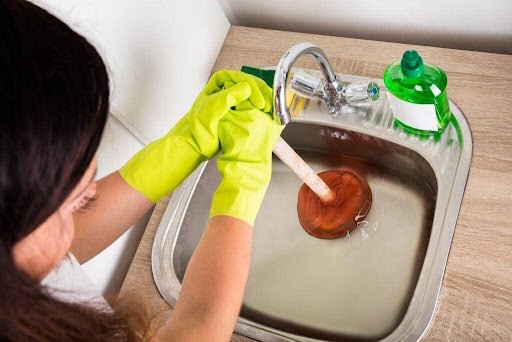
1) Clean Your Kitchen Faucet Sink Cabinet
Before beginning the faucet replacement, clear out any items stored under the sink to create ample working space. Wipe down the area to ensure a clean and organized workspace. You will also need to interact with the bottom side of your kitchen sink faucet.
Therefore, it is necessary to clear out to clean lower cabinet kitchen to complete the task without any halt. For this, it is better to use simple cleaning items such as a broom or a paper towel.
2) Shut Off Water Supply
After cleaning the cabinet, the next step is to turn off the main water supply. It is necessary to let the standing water in the sink’s pipe drain out or shut off completely. You can also turn off the water supply from your faucet’s valves. Ensure to disconnect or turn off both valves of the faucet.
3) Disconnect Sprayer Head
If your kitchen sink faucet also includes a sprayer, you will need to perform this step. The basic purpose of a sprayer is to supply cold and hot water to the kitchen sink faucet in combination. It is not essential to replace a sprayer if you are changing a kitchen sink faucet.
However, if you want to, you can install a new sprayer head afterward.
4) Use a Wrench to Unscrew the Nuts
Identifying the location of your kitchen faucet’s nuts is important because you will need to loosen or remove those nuts while changing the faucet. Under the sink, you will find nuts securing the faucet to the sink deck. Use an adjustable wrench to carefully loosen and unscrew these nuts. This will release the old faucet from its position. If there is rust or buildup on the nuts, it may be difficult to remove them with a wrench. For this, you can apply a sewing machine oil or any other hardware oil to lose the nuts.
5) Pull Out Kitchen Sink Faucet
Before pulling out the kitchen sink faucet, clean the residue from the nuts if you have applied oil to loosen them. Keep in mind that you may also encounter grossness and buildup while performing the faucet removal.
It is better to wear a face mask and safety gloves while pulling out the kitchen sink faucet. Once you have removed the old faucet and cleaned the entire area, it’s time to place or install a new kitchen sink faucet.
Before pulling out the kitchen sink faucet, clean the residue from the nuts if you have applied oil to loosen them. Keep in mind that you may also encounter grossness and buildup while performing the faucet removal.
6) Install New Kitchen Sink Faucet’s Cover Plate
Not all kitchen sink faucets have cover plates. However, most of the modern faucets are equipped with them. If you are going to install a kitchen sink faucet with single or multiple holes, you may need to use a cover plate.
You can also use a cover plate if you are going to install a single-hole kitchen sink faucet in place of a double or multiple-hole faucet. These cover plates are essential for cold and hot water pipes that are attached to your kitchen sink faucet.
7) Push Down the Faucet Tubes
Ensure to push down all tubes and pipes into the center holes in a vertical position. After placing them correctly, verify that the installed kitchen sink faucet’s bracket is horizontal.
The best thing about modern faucets is that you can tighten the tubes of these faucets from upside down without using any wrench or screwdriver. You can also tighten the pipes or kitchen sink faucet in the center holes by turning it in a clockwise position.
If there’s tension while turning the fitting tool, your new kitchen sink faucet is all set or installed properly!
8) Reconnect Water Supply Lines
After fitting or placing a new kitchen sink faucet, reconnect both cold and hot water supply lines to the faucet to test its functionality. By doing this, you can identify and address any potential issues that may have arisen during the installation process.
After fitting or placing a new kitchen sink faucet, reconnect both cold and hot water supply lines to the faucet to test its functionality. By doing this, you can identify and address any potential issues that may have arisen during the installation process.
9) Test Faucet for Leaks
Now that the new faucet is in place, turn on the water supply valves and check them to prevent leaks. Allow the water to flow for a few minutes to ensure everything is functioning correctly. If any leaks are detected, tighten the connections as needed.
How to Replace a Kitchen Faucet with Sprayer

If your kitchen sink faucet includes a connection point for a sprayer, the process for changing the kitchen faucet remains the same, as outlined in the steps discussed above. However, you will need to perform a few additional steps to change the kitchen faucet with a sprayer.
- To change the kitchen faucet, you have already disconnected your sprayer lines at the time of changing your faucet (see step 3 in the previous heading).
- After completing the faucet replacement process, you will need to reconnect either your new or the original sprayer supply lines to the kitchen sink faucet. A sprayer resembles a braided pipe. So, you will need to thread the ends of this pipe first before connecting it back to your faucet. Doing so will help you to place the sprayer at the same location along with your faucet without any difficulty.
- Use a clip to tighten the sprayer lines with your faucet. Use a clip to remove the sprayer the next time when required to change or replace your kitchen sink faucet.
Upgrade Your Kitchen Faucet Right Now!
You may now enjoy the ease of modern features and a fresh, elegant style that fits your kitchen decor with your new kitchen faucet installed. You no longer have to worry about leaks or obsolete designs because you can now work on fixing the kitchen faucet in simple steps.