Roof trusses have surpassed rafters as the most preferred method of building roof frames, and there are numerous reasons for this. Roof trusses are not only more inexpensive, but they are also incredibly adaptable and practical.
It’s hardly surprising that contractors and homeowners prefer roof trusses to conventional roofs, given the widespread adoption of open floor plans and huge home spaces. A roof truss is a structural structure used to support a building’s roof, which weighs a lot.
They are frequently utilized in residential and agricultural structures like barns. The roof trusses are put together to create an open area for your attic or loft area inside the house. Installing them could be challenging if you’ve never worked on construction projects.
Table of Contents
Roof Truss: An Overview
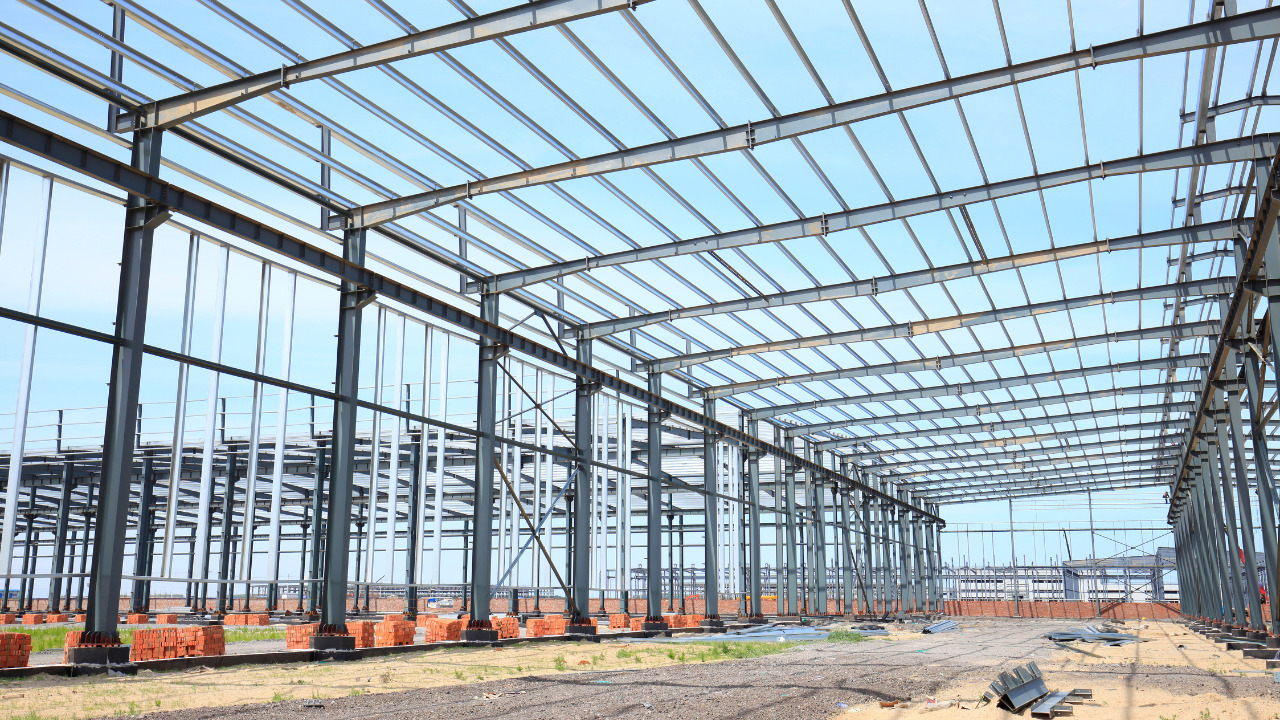
A diagonal structural component called a roof truss aids in supporting roofs. It can be applied to any form of roof, whether low-pitched or steeply angled, ranging from flat to gable and hip styles. They can be built with steel beams, although wood is the material that is used most frequently, or with a combination of both.
The truss comprises top and bottom chords that are joined together to form a triangle-shaped structure with a central web. It can be made of solid wood or engineered timber. This design is especially helpful in constructing roofs since it distributes the weight to the joints at either chord’s end.
The size and direction of the individual boards are chosen by architectural considerations like the need for load-bearing to maximize the strength of the truss.
Things To Consider Before Installing A Truss
Know About The Type Of Truss
Although it may seem obvious, this advice is crucial. Different roof truss designs necessitate various installation techniques. Every point of the hip roof trusses slopes downward. In most cases, these trusses may be installed without the assistance of a crane because they are so simple.
However, not all truss designs will be that straightforward. A vaulted scissor truss with a coffer and an attic room can frequently be found in the same truss design. There is a greater requirement for more planning and direction when you go from a simple, straightforward truss setup.
Make sure you know all the requirements for your truss design and can handle each installation phase.
Fitting Truss Is Better Than Lifting
You can use this advice to prevent rushing the roof truss installation. If some elements don’t fit together like perfectly aligned puzzle pieces, you don’t want to start lifting trusses to the structure’s top floor.
The producer of prefabricated trusses will give you a plan and layout of the truss construction if you utilize them. As a result, understanding how the trusses should fit together is not too difficult.
Steps To Install A Truss
Create A Truss Layout
A big truck’s bed is used to transport roof trusses to the project site. The trusses must typically be moved with a crane since they are cumbersome. The trusses come with a detailed instruction leaflet, a diagram, and a layout of the truss design.
The diagram shows that each truss member has a unique number, which must first be transferred to the top wall plates.
Place The First Truss
The manufacturer has provided detailed instructions for each step of the truss installation. The contractor often places the trusses on the side of the roof opposite their intended location. The first truss is physically moved to the end of the roof, stood up, and put on the wall plate’s matching number.
Once the truss is in position, the workers secure it with nails on both sides to the wall plate and fasten temporary supports to keep it upright.
Attach Ridge Beam To Truss
A ridge beam is then attached to the peak of each truss after the second truss has been set in the same way. As it reaches that point, a beam hangs over the trusses at the far end of the roof.
Attaching each succeeding truss to the wall plates and the ridge beam happens as the workers position it. Although they can only be attached to the upper truss chord, workers may employ additional temporary supports between the trusses. The other truss members cannot have any arbitrary nails placed in them.
Attach All Trusses
Roof trusses are made to move together to preserve the roof’s structural integrity despite how odd it seems. As a result of the truss members being under stress from changing humidity and temperature, the bottom chord’s center may lift.
Nail-fixing the bottom chord to the top of internal walls that are not marked walls is one of the major errors rookie truss setters make. Unfortunately, it renders the truss immobile, nullifies the warranty from the manufacturer, and may cause additional truss members to crack.
Bottom Line
Installation of roof trusses is one of those tasks where hiring a professional could be a good idea. Even if you’re handling most of the job yourself, decades of experience using various trusses and construction techniques are incomparable.
Additionally, because each truss is constructed from numerous boards cemented together, they are less likely to split or deform with time. As a result, engineered wood trusses are a wise choice for homeowners who want to complete their building project quickly and affordably while ensuring that each piece is as strong as possible.