Nowadays, homeowners prefer installing or adding concrete floors because of their easy maintenance. Not only this, but the concrete floor also looks more attractive and appealing than other floors. However, owners and floor builders must sand the floor for revelation and appearance.
Now, the main question is how to sand the concrete on the floor. Do you need to hire professionals to sand the floor? If you are also looking for the answers to these questions, you are at the right place. We have collected the best steps and techniques for sanding the concrete floor effortlessly.
Table of Contents
Why Do You Need To Sand Concrete Floor?
There are a few good reasons to take on this project, even though sanding concrete may seem like a laborious task. Concrete can be smoothed out after repairs and given a better overall appearance by sanding. Sanding concrete can significantly improve the appearance of a concrete surface, such as kitchen countertops or floors, by removing imperfections or even by giving the concrete a distinct finish that alters its texture.
Corners might result in dangerous edges or uneven surfaces once the concrete has been poured. Each of them raises the possibility of dangers that could hurt people walking on concrete or, in the case of a driveway, even damage tires.
In addition to improving aesthetic appeal, smoothing out these areas can make a driveway or tabletop safer. Sanding is frequently required to provide a smooth and consistent appearance when repairs are performed to cracked or chipped concrete.
Because it’s challenging to match the filler to the existing concrete, you might need to paint or stain after sanding.
Remove Stains Through Sanding
When cement, water, and coarse gravel are combined, concrete—an incredibly durable material, is created. There are frequently rough edges or flaws, like protruding aggregate or high places, after the concrete has dried and hardened. By sanding these problems, they can be resolved.

Sharp edges and protruding material should be smoothed to prevent personal harm and tire damage. Detergents or paint strippers can typically be used to remove oil or glue stains and previous coats of paint. Even when utilizing some of the strongest chemicals available, a stain or coating might occasionally be challenging to remove.
You eliminate a layer of concrete when you sand over a stain or old paint, which will remove the stain or paint and leave you with a clean, new surface.
Get Desired Floor Finishing With Sanding
Sanding concrete to get the desired look is the most frequent reason. Before using a stain or coat of paint, concrete is frequently sanded. Boosting the coating or stain’s adherence helps to get the required surface profile. Applying an acid wash is another method, though, for accomplishing this.
Depending on the sanding amount, one can get a few different looks. Light hand sanding and polishing, as well as a random orbital sander, are also effective ways to get a clean finish.
The simplest finish to obtain is this one because very little concrete is removed; instead, you are merely polishing the concrete’s surface.
Things To Consider Before Sanding The Concrete Floor
Most people focus on the floor sanding to give it a wholly exposed look. These floors are super easy to clean and maintain. But you must install or sand the floor appropriately before considering keeping it. If you want to rub the concrete surface, make sure that the surface is smooth and level.
Undoubtedly, figuring out how to sand the concrete floor is a more difficult question than maintaining the floor. Don’t worry; it’s not something that you cannot do yourself. One can surely sand the floor by following expert-level instructions and guidelines. So, let’s dive deeply into all the steps for better consideration.
Clean And Smooth The Surface
Even before sanding the floor, you must clean the surface appropriately. It’s useless and a waste of money to sand the dirty and uneven floor. Therefore, it’s better to find out all the irregularities while cleaning. Moreover, inspect or examine the complete floor for cracks and any damage. So, you can fix the damages earlier.
Keep in mind to remove the concrete bumps from the corners more carefully. Don’t use the sharpest tools for this purpose. You can safely use the chisel or a simple scraper to remove all the bumps without floor damage.
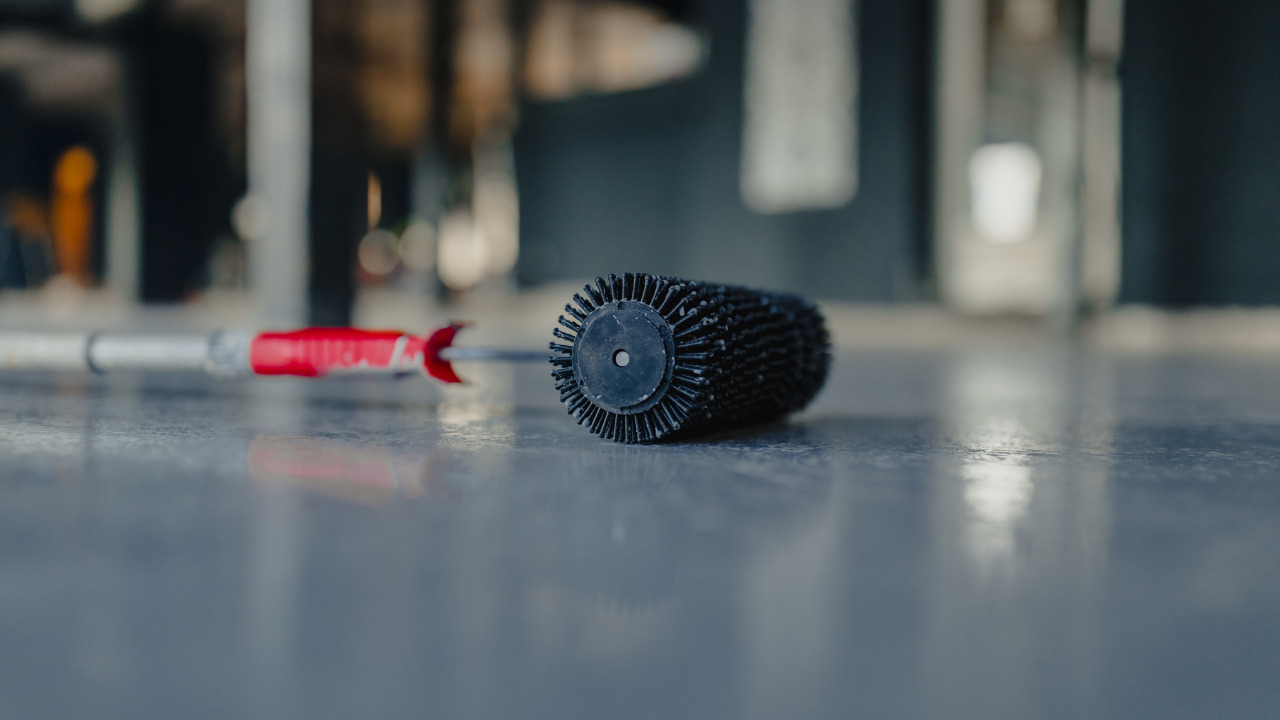
Choose The Sanding Tools Wisely
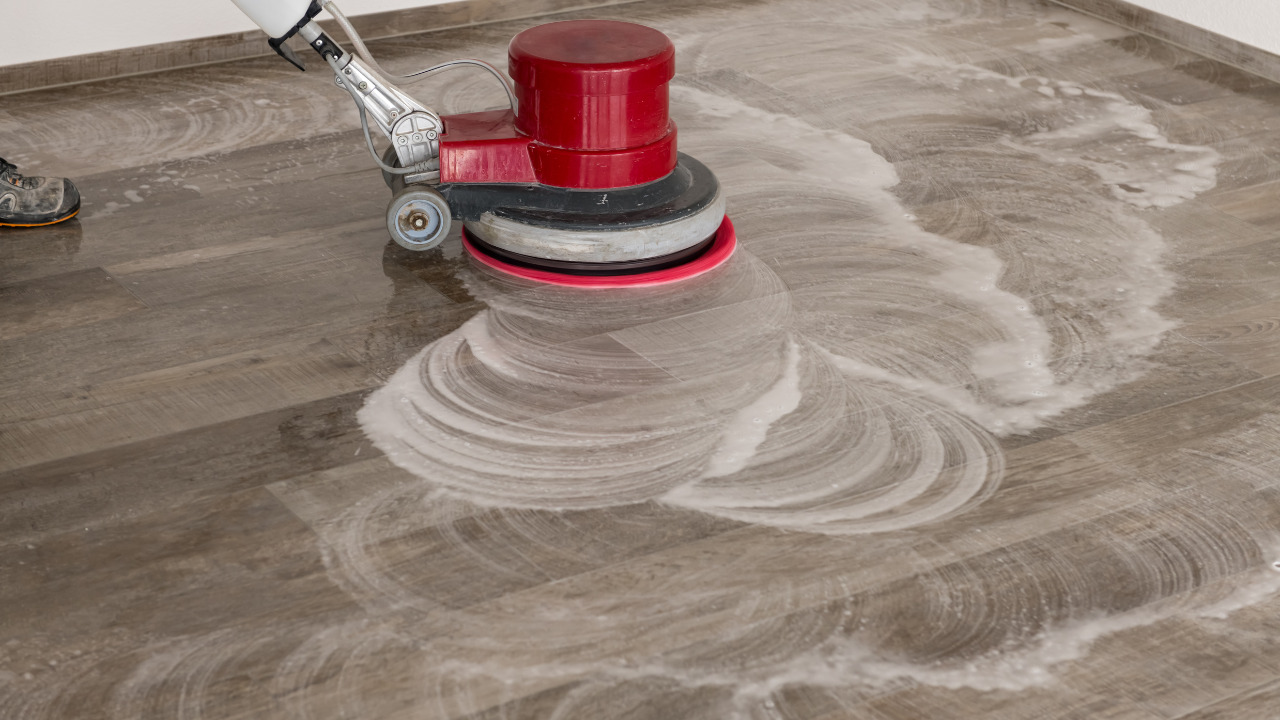
Determine the type and condition of the concrete floor before choosing the sanding tools. If you have to sand the floor entirely for total exposure, use an orbital sander. You must use the orbital sander wet or dry according to the floor’s condition.
Unfortunately, you cannot get the desired results with this tool, which will also take more time than usual. However, you can also go for a grinder if you have already done some sanding projects. Otherwise, it will be difficult for you to use this sanding tool.
Well, there are many types of sanders available in the market. But you still have to choose one according to your skill level and the floor’s requirements.
Determine The Range Of Sandpaper’s Grits
As we mentioned earlier, the selection of sandpaper depends on the floor’s conditions and your skill levels. Similarly, you must choose the grits of sandpaper accordingly to get your job done nicely. If you are searching for basic-level sanding, go for the lower grit sandpaper. However, use higher grit sandpaper for smooth and proper floor finishing.
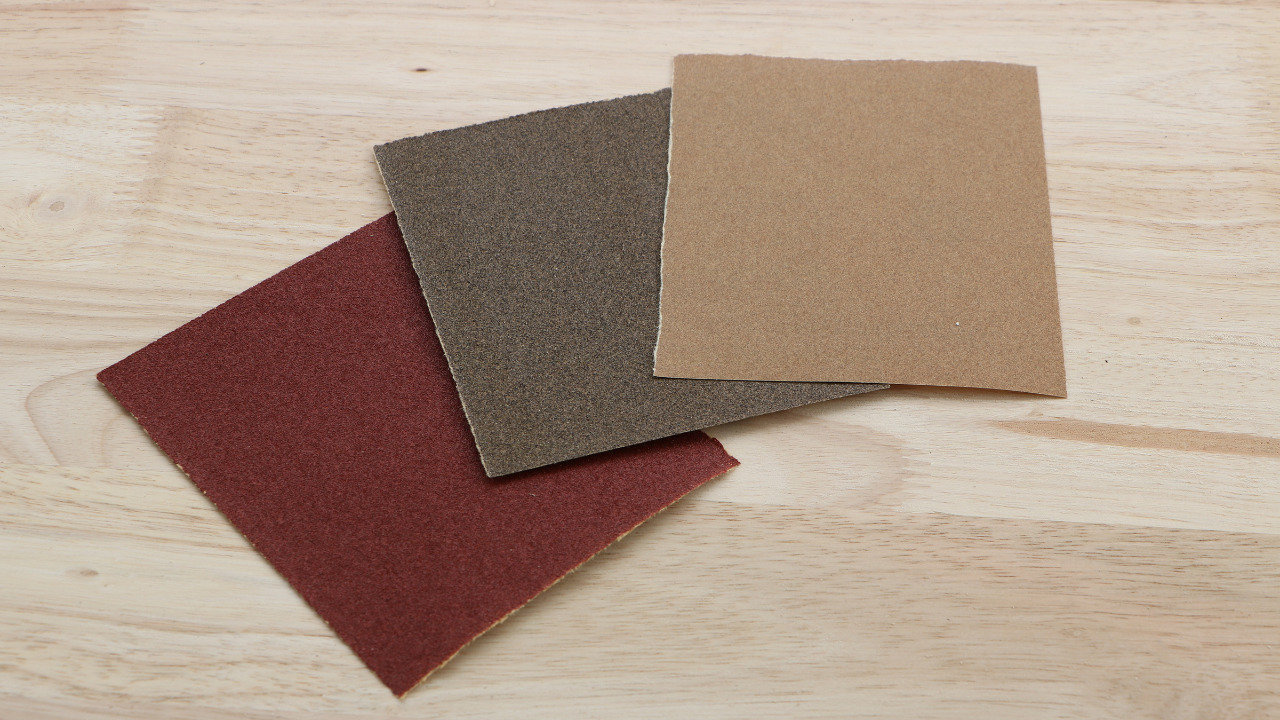
Use the grinder instead of sandpaper if the floor is not in good condition or has cracks from different points. Are you working for the first time on the floor sanding? If yes, choose the basic grinding disc instead of a higher one.
Start From Corner To Ends
Well, it’s great to hire professionals for the sanding. But you can do it yourself if you don’t have enough budget and time. You must work in a professional pattern or method to achieve successful concrete floor sanding results.
You can start sanding the area from corner to end to complete it smoothly. Moreover, you can also work in the small sections to get the job done effortlessly. You can cover the entire area without leaving a single corner. Ideally, you can use the grinder even after using the sandpaper to achieve smoother and grandeur results.
Once you have sanded the floor, please wait until it dries completely. Clean the floor thoroughly after drying. This way, you can remove all the sanding dust, dirt and debris.
Removing the bumps and sand debris earlier after sanding is always better. Over time it would be difficult for the owner to clean the floor.
Use A Concrete Sealant For Smooth Finishing
Do you want to give a glossy finish to the floor after sanding? If yes, use a sealant after the sanding process. Not only for the attractive appearance, but sealant is also essential to save and maintain the floor.
Even after post-sanding cleaning and sealing, you must clean the floor to keep it durable for a long time. Moreover, you can also apply the sealant after the yearly cleaning of the base yourself for a better concrete surface.
Steps To Sand A Concrete Floor
Needed Tools And Materials
- Concrete Grinder
- Mop
- orbital sander
- vacuum cleaner
- Concrete sealant
1) Prepare The Floor
Before you start sanding the concrete, make sure to properly clean it, both for larger surfaces like floors and for smaller ones like countertops. Using a grinder, you might need to start by scraping off paint or sealer. Vacuum the floor thoroughly, then mop the surface to clean it.
To remove filth on the flooring, moisten the area and wipe away extra moisture. You might give it a thorough cleaning using the concrete cleaner. This eliminates any textural problems brought by sandpaper becoming stuck in the dirt.
Prepare everything else in the area, including the concrete, to prevent concrete dust from getting on it. Having a vacuum linked to your sander while you work is excellent, but some dust may still escape. Dust can be contained by placing plastic sheeting over furniture or hanging it in doorways.
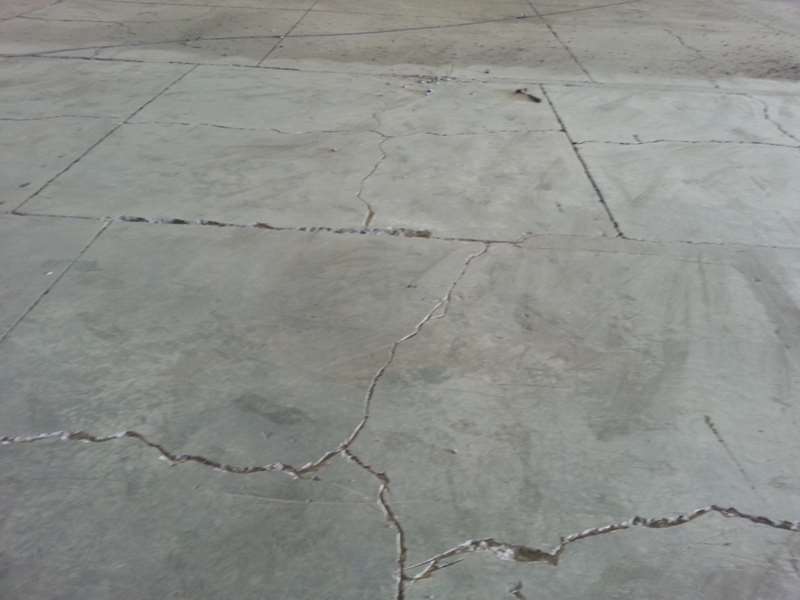
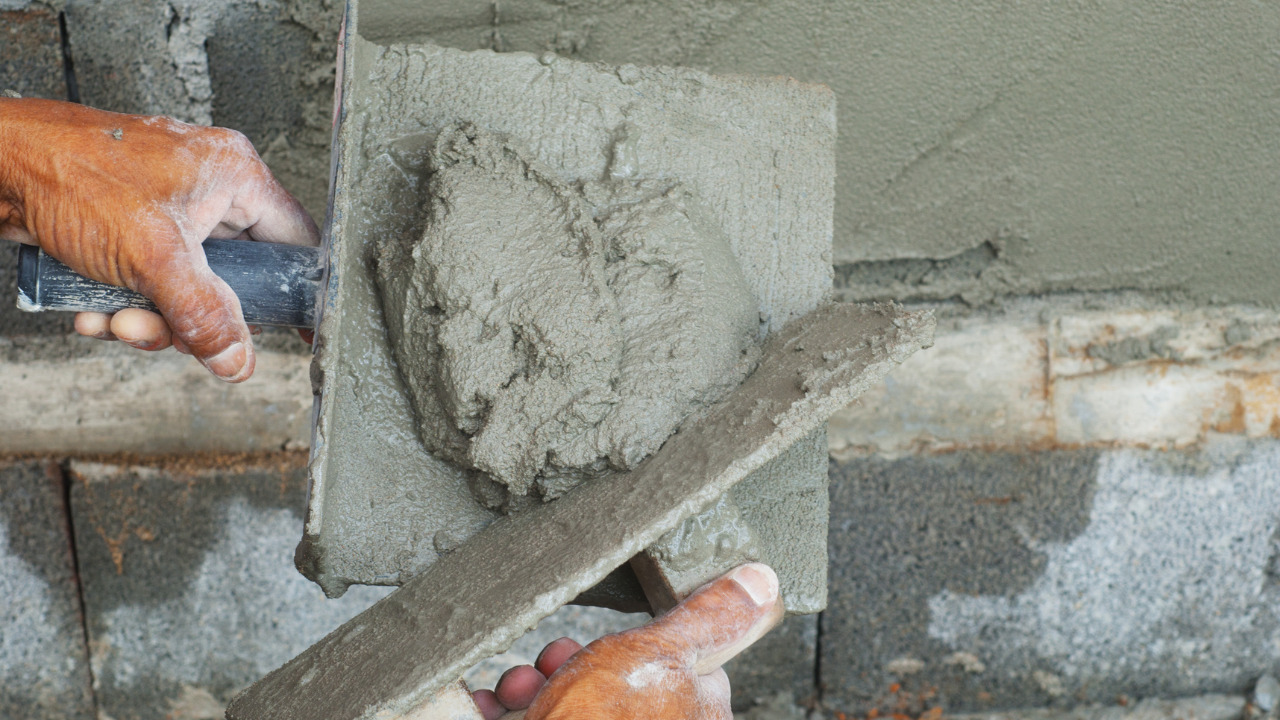
2) Repair And Fix Cracks
Look for cracks or chips in the concrete surface, then use a concrete filler to replace them. Before beginning the sanding process, let the filler dry fully. Clean the area with a solution of water and a household detergent when it has dried.
To remove any stains from the concrete, use an industrial-strength cleaning like hydrogen peroxide or ammonia. When handling these chemicals, use gloves and safety goggles, and make sure the environment is sufficiently ventilated.
Patch any holes with concrete slurry before beginning. If you slightly overfill these, you will soon be able to sand them down with sandpaper or a sander. It is advised to match the color of any filler substance.
It will be quite obvious if it is not the same color as the original concrete when dry.
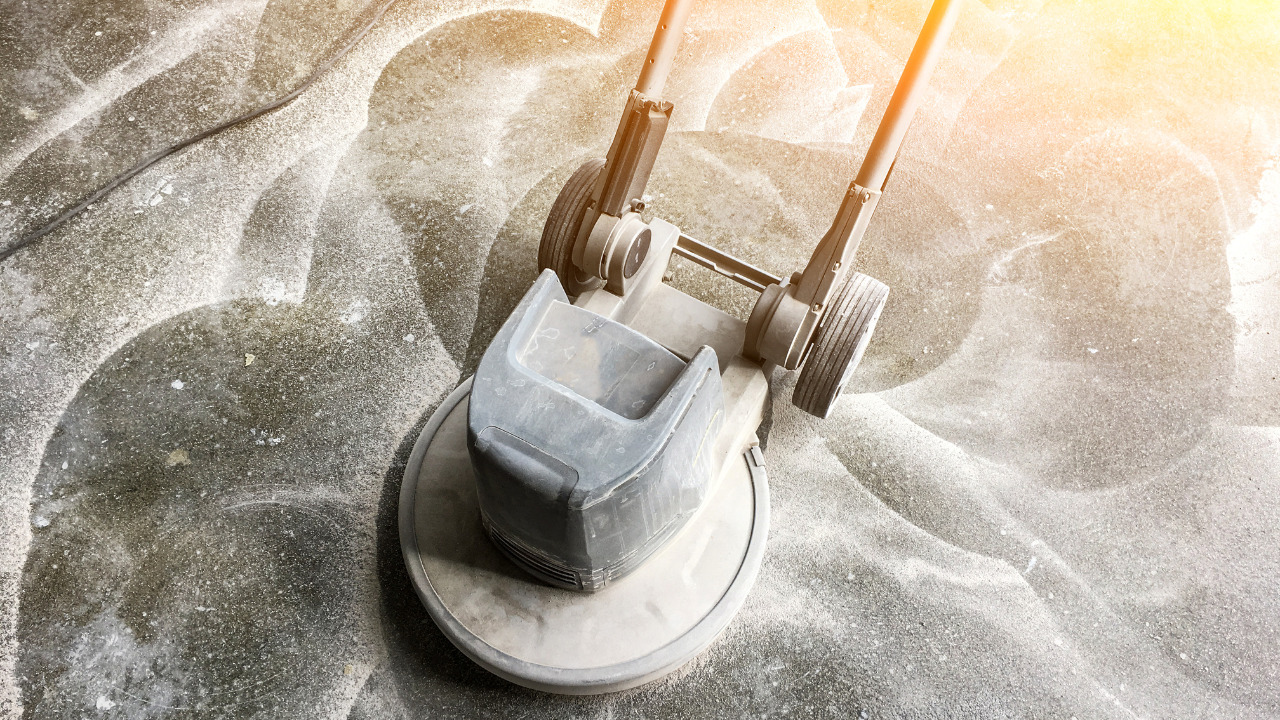
3) Sand The Repaired Floor
Decide on the wet or dry approach before you start. Water is used as a lubricant in wet sanding during the sanding process. By keeping the pads cool, friction is reduced, extending the life of the pads.
Wetting down the dust reduces the airborne amount and contributes to the reduction of dust. Additionally messy is wet sanding, which takes a lot of water and produces a slurry that must be cleaned up and disposed of as you go. When utilizing this procedure, it’s also challenging to get a glossy surface.
A finer grit should be used after sanding the concrete using the grit disc or sandpaper. Ensure all the scratches left by the preceding pad have been eliminated before switching to a finer grit.
4) Floor Polishing
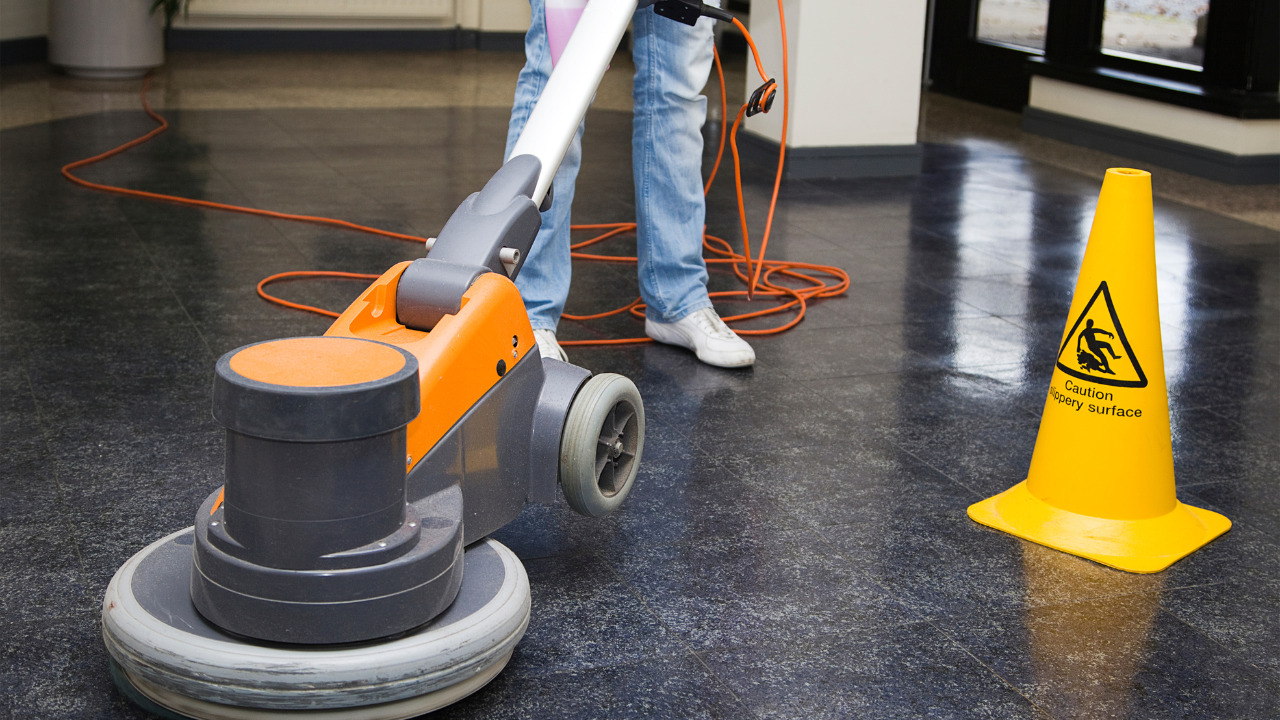
Make sure to completely cover the area when polishing the concrete surface with a grit disc or sandpaper. The concrete surface will be polished to a high sheen with this high grit sandpaper or grinding disc. Use a buffer to finish polishing the surface after removing any dust.
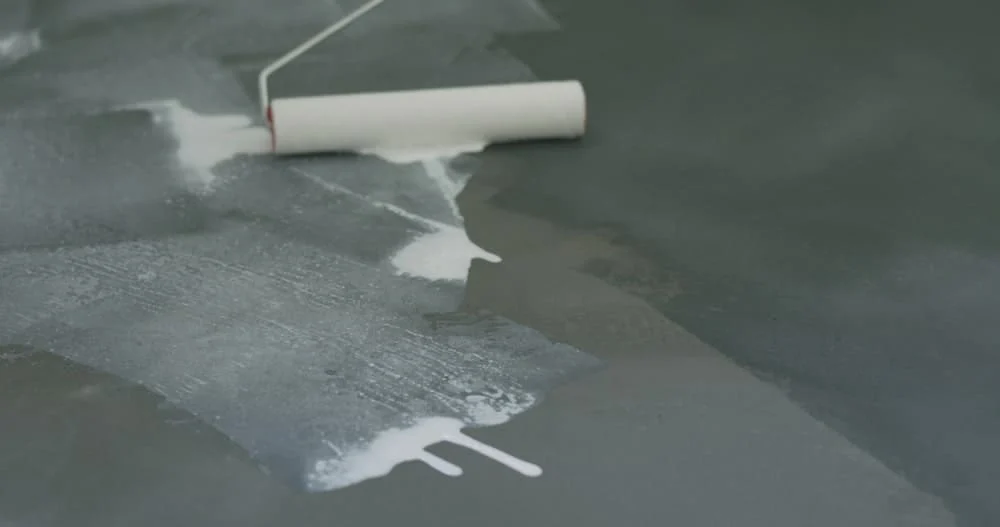
5) Apply Floor Sealant
Apply a concrete sealer after giving the floor plenty of time to dry, especially if you sanded or ground it using the wet approach. This sealer will shield the surface you’ve worked so hard to restore from stains by oil, grease, and other liquids.

Finishing calls for one last washing with water to remove dust and highlight uneven surfaces. This final rinse may take up to two days to dry after it has been applied to the concrete. Your preferred final sealant can be used.
One common choice is epoxy resins. To let it dry, you will need one to three days.
Frequently Asked Questions
How To Maintain Sanded Concrete Floor?
Once you have sanded the concrete floor, it’s time to maintain it appropriately. Not only after sanding, but you have to clean and maintain the base over time for a betterment and more appealing look. You must wet mop the floor daily with a damp or soft cloth. Use natural cleaners and ingredients instead of using chemicals and detergents.

If you have kids or pets, spills and spots on the floor will occur. It’s better to clean the wet and fresh spills than to dry them. Otherwise, it would help if you put more time and effort into cleaning the dried spots.
Which Is The Best Sandpaper For Concrete Floors?
Choosing the proper grinding pad or sandpaper for the concrete-sanding instrument, you intend to use. Start with coarser 40-grit sandpaper if you need to remove a lot of material to level uneven surfaces or change the appearance of concrete.
Start with 80 to 120 grit sandpaper to smooth the concrete with few imperfections. Use sandpaper with a grit rating of 200-400 if you only want a smooth finish. Gradually raising the grits to 800 or more is required if you want the concrete to have a shiny finish.
Is It Essential To Seal Concrete After Sanding?
Even if you don’t have to seal the concrete after sanding, it only makes sense to do so if you’re going to put in the time and effort to sand and polish concrete. Due to its porous nature, concrete readily absorbs liquids. Because of this, concrete is easily stained by oils and chemicals.
Additionally, it is more prone to cracking and chipping as a result. Concrete can be protected by sealing it to make the surface water-resistant. In addition to safeguarding the concrete’s surface, sealing also gives it a finished appearance by intensifying its color and giving it a glossy sheen.
Conclusion
In short, sanding concrete floors look better than any other type of floor. However, it would be most efficient if you do the sanding with the help of professionals.
But it’s worth it to sand the floor yourself by following the steps discussed above. Hopefully, you have enough information from this article to get a compelling and splendid concrete-sanded base. Now, it’s your turn to get help from this post and sand the concrete floor.