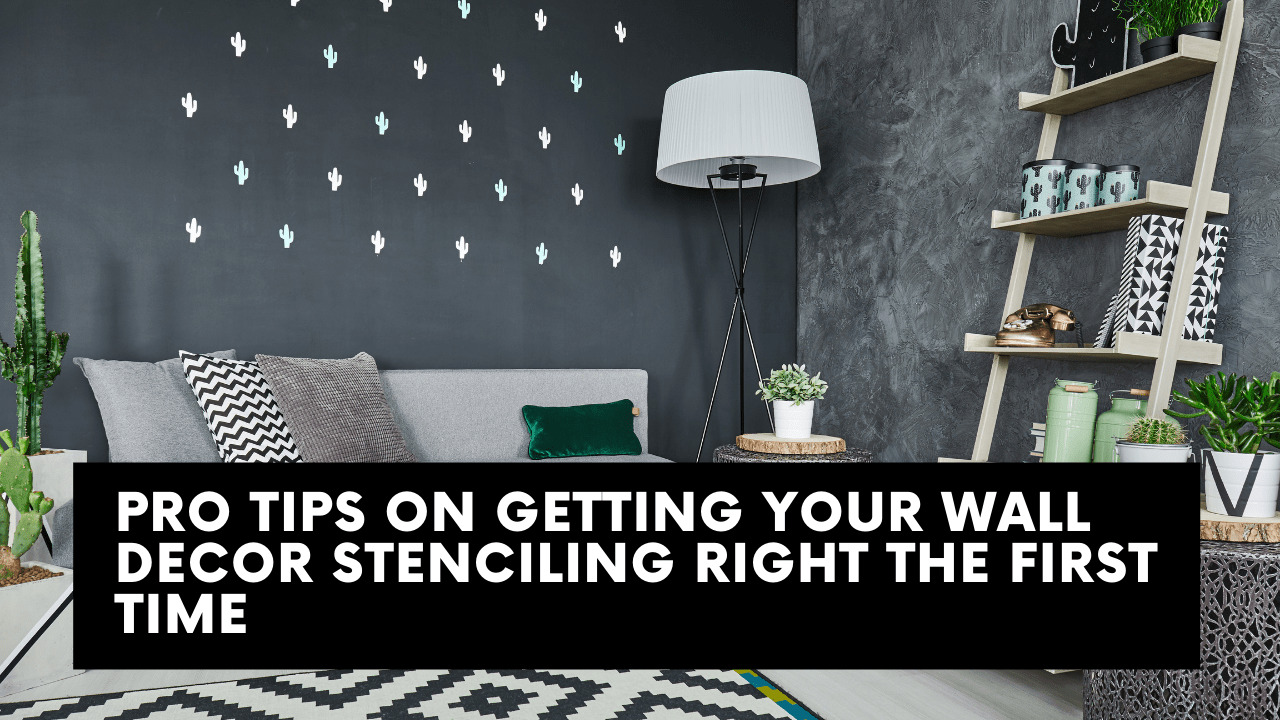
Stencils represent an interesting and creative method of going up your walls for exclusive home décor. You can use a variety of stencils with different shapes and patterns to apply a full spectrum of colors to create an awesome effect on your walls and other surfaces.
While you can always hire a painting professional to stencil the walls, it can be expensive. A good alternative is doing it yourself. However, you must use the proper application technique to achieve a result you will be proud of.
Table of Contents
Why is stenciling important?
Stenciling is important because it can add personality and flair to any room in your house. It is also a very affordable way to decorate, and the results can be breathtaking. By using stencils, you can create a unique look for each room in your home, which will make it stand out from all the others.
How to stencil your walls the right way
There are a few things you need to do in order to stencil your walls the right way. First, you need to choose the right stencil and the right paint.
Make sure that the stencil is designed for use on walls, and that the paint is specially formulated for use on stencils. You don’t want to use just any old paint because it may not be designed to resist fading, peeling, or smudging.
Once you have the right supplies, you need to prepare the surface of the wall. Make sure that it is free of dust, dirt, and other debris. If necessary, clean it with a damp cloth.
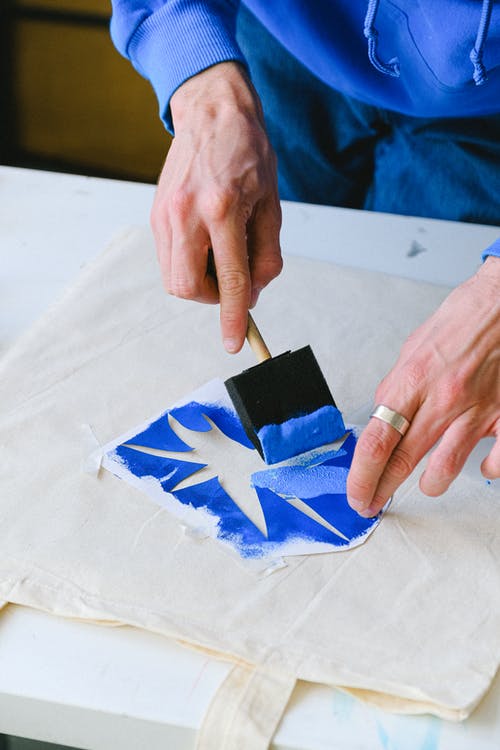
Then, tape the stencil in place and start dabbing the paint onto the wall. Be careful not to overload the stencil with paint, or it will smudge. Use a light hand and go over each section of the stencil several times to get an even coat of paint. Once you’re finished, remove the stencil and let the paint dry.
If you follow these tips, you will be able to stencil your walls like a pro and achieve a beautiful, polished look that will be the envy of your friends and family. Happy stenciling!

Some handy tips on the right way of using stencils in home décor
Use a Guide to Align the Stencil
The secret of an attractive stencil design on your wall is keeping the alignment of the stencil straight as you repeat its use. To achieve the straight line you want vertically and horizontally, you should use a pencil to lay a guideline using a long level or chalk to put on a line level.
You can also use a line projected using a laser level. A straight line will ensure that the design does not inadvertently slant and look funny after you have finished applying it.
Use Adhesive to Keep the Stencil in Place
When you apply paint using a brush, a roller, or even a spray gun, you will need the stencil to be in place on the wall without moving. The best way of fixing large Christmas stencils to different surfaces is double-sided adhesive tape.
If you are working on a surface where the finish may come off when you peel off the tape, you should think of using something with low tack like a spray-on stencil adhesive or a low-tack painter’s tape. You must make sure that the stencil sits flat on the surface before you start painting.
Use Thin Coats of Paint
It is natural to try to use more paint to achieve a deeper color effect, but the problem is the paint will tend to seep under the edges of the stencil and spoil the pattern.
It is better to load the brush with less paint by removing the excess paint by running the bristles on the inside of the rim of the paint container. Instead of applying a thick coat of paint, it is better to apply two thin coats.
However, you must allow the first coat to dry before applying the second one. According to Whipper Berry, you should let the paint dry before removing the stencil to avoid smudging.
You will get the best effect if you use stenciling brushes. They are round, not flat, and have short and stiff bristles. You can prevent the paint from getting on to the surface under the edges of the stencil using these brushes. You can also use a roller brush or spray paint.

HOW TO STENCIL ANYTHING: 10 SECRETS TO PERFECT RESULTS EVERY TIME
When you’re stenciling, there are a few things you can do to ensure perfect results every time. Here are 10 secrets to great stenciling:
1. Choose the right stencil for the job. Not all stencils are created equal–some are designed for intricate details, while others are better suited for large areas. Choose the right stencil for the project at hand to avoid frustration and mistakes.
2. Tape your stencil in place. This is especially important if you’re using a delicate or intricate stencil. Make sure the tape is stuck down well, so the stencil doesn’t move as you’re painting.
3. Apply paint with a brush. A brush will give you the best control over the paint, and will help prevent seepage under the stencil’s edges.
4. Start in the middle and work your way out. If you start at the edges of the stencil and work your way in, you’re more likely to get paint on the surface underneath, ruining your design.
5. Use a light hand. You don’t need to apply a lot of pressure when stenciling–a light touch will give you the best results.
6. Load your brush with paint. Dip the bristles of your brush into the paint, then remove the excess by running them along the inside of the paint container. This will help prevent seepage under the stencil’s edges.
7. Apply thin coats of paint. A thick coat of paint is more likely to seep under the stencil, ruining your design. It’s better to apply two thin coats of paint than one thick coat.
8. Let the paint dry before removing the stencil. If you try to remove the stencil before the paint has dried, you’re more likely to smudge it.
9. Use a stenciling brush. These brushes are designed specifically for stenciling, and have short, stiff bristles that help prevent paint from seeping under the edges of the stencil.
10. Experiment! stenciling is a great way to try out new techniques and experiment with different colors and designs. Have fun with it, and be creative!
There you have it–10 secrets for perfect stenciling every time. With these tips in hand, you’re ready to start stenciling like a pro!
Color choosing for stencil designs
When choosing colors for your stencil design, it’s important to think about how the colors will work together. Complementary colors (colors that are opposite each other on the color wheel) usually look good together, as do analogous colors (colors that are close to each other on the color wheel).
If you’re not sure what colors to choose, try using a color wheel to help you decide.

Here are a few tips for matching colors with your stencil
1. Choose complementary colors. Complementary colors are those that are opposite each other on the color wheel, and they usually look good together. For example, blue and orange, or green and red.
2. Use analogous colors. Analogous colors are those that are close to each other on the color wheel, and they often look harmonious together. For example, yellow and green, or purple and red.
3. Experiment with different color combinations. There’s no right or wrong answer when it comes to choosing colors– experimentation is the key to finding the right combo for your project.
4. Use a color wheel to help you choose colors. A color wheel can be a useful tool when choosing colors for your stencil design. It can help you see how different colors interact with each other, and find complementary and analogous colors.
When it comes to stenciling, the sky’s the limit! With these tips in hand, you’re ready to start creating your own beautiful designs. Happy stenciling!
How to choose stencil designs? 10 tips from pro
There are all sorts of stencil designs to choose from, so how do you know which one is right for your project? Here are a few tips:
1. Choose a design that fits the theme of your project. If you’re stenciling a wall mural, for example, choose a design that corresponds with the room’s décor.
2. Choose a design that’s easy to paint. If you’re a beginner, choose a simple design that’s easy to replicate.
3. Choose a design that’s in proportion to the project size. A large stencil design is perfect for a large surface area, while a small stencil design is perfect for intricate details.
4. Choose a design that’s easy to clean. Some stencil designs are difficult to clean, so choose one that’s easy to wipe down.
5. Choose a design that’s flexible. Some stencil designs are rigid, while others are flexible. Choose a design that’s easy to work with.
6. Choose a design that’s durable. Some stencils are made from thin plastic, while others are made from metal. Choose a design that’s strong and won’t tear easily.
7. Choose a design that’s easy to store. Some stencils fold up for easy storage, while others take up a lot of space. Choose a design that’s easy to store and transport.
8. Let the paint dry before removing the stencil. If you try to remove the stencil before the paint has dried, you may damage the stencil or the paint job.
9. Use a stencil brush for intricate designs. A stencil brush has thin, short bristles that help prevent paint from seeping under the edges of the stencil.
10. Experiment! stenciling is a great way to try out new techniques and experiment with different colors and designs. Have fun and be creative!
When it comes to stenciling, the sky’s the limit! With these tips in hand, you’re ready to start creating your own beautiful designs. Happy stenciling!
-Choose a complementary color scheme.
-Use analogous colors to create a harmonious look.
-Experiment with different color combinations.
-Use a color wheel to help you choose colors.
-Choose a simple design for beginners.
-Choose a design that’s easy to clean.
-Choose a flexible stencil design.
-Choose a durable stencil design.
-Store your stencil in a safe place when not in use.
-Remove the stencil once the paint has dried.
-Use a stencil brush for intricate designs.
-Experiment with new techniques and colors!
When stenciling, it’s important to choose the right stencil for the job. Not all stencils are created equal–some are designed for intricate details, while others are better suited for large areas. Choose the right stencil for the project at hand to avoid frustration and mistakes.
Another important thing to keep in mind when stenciling is taping your stencil in place. This is especially important if you’re using a delicate or intricate stencil. Make sure the tape is stuck down well, so the stencil doesn’t move as you’re painting.
Some FAQ on stenciling
Q: How do I keep the paint from seeping under the edges of the stencil?
A: One way to prevent this is to load your brush with paint, then remove the excess by running them along the inside of the paint container. This will help the bristles stay stiff and prevent the paint from seeping under the stencil’s edges.
Q: How do I prevent the paint from getting on to the surface under the stencil?
A: You can use a stenciling brush, which is designed specifically for this purpose. They have short, stiff bristles that help keep the paint from getting on to the surface under the stencil.
Q: What is the best way to hold the stencil while I’m painting?
A: You can either tape the stencil in place or use your fingers to hold it in place. If you’re using delicate or intricate stencils, taping it in place is the better option.
Q: Do I need to apply a lot of pressure when stenciling?
A: No, you don’t need to apply a lot of pressure. A light touch will give you the best results.
Q: What is the best way to avoid smudging the paint?
A: Let the paint dry before removing the stencil. If you try to remove the stencil before it’s dry, you’re more likely to smudge it.
Q: How can I create different effects when stenciling?
A: Experiment with different colors and designs to create unique effects. stenciling is a great way to try out new techniques and experiment with different styles. Have fun with it!
Now that you know the basics of stenciling, why not try it out for yourself? These tips will help you create beautiful designs every time. Happy stenciling!
Conclusion
Like anything else, it will take some practice before you become adept in stenciling walls and other surfaces. You can practice by applying the stencil on pieces of cardboard or paper to get the hang of it. If you intend to work with multiple colors, remember to mask off areas on the stencil where you don’t want a particular color.