So you have made the wise decision of investing in a raised access floor system for your space—be it a data center, office, or medical facility. Congratulations! You have just invested your time and money toward a project that will lead to increased flexibility, improved aesthetics, and efficient cable management.
But now you’re likely wondering how am I going to unbox and assemble this? Well, in this blog we will give a full breakdown of how the process works. You can use this information to install it yourself or just to have a better idea of how it works when you hire an installation service. Continue reading the article below to learn more.
Table of Contents
Assessment and Planning
Prior to unboxing your kit, take some time to assess and plan out how your raised access floor system will look in its final configuration. Think carefully about any special considerations related to your environment that could influence its design—this step will ensure a successful and hassle-free installation experience.
Subfloor Preparation
After carefully considering your space and devising your layout plan, it’s time to prepare the subfloor. This involves leveling any uneven areas on the subfloor and addressing any structural concerns—this provides the proper support needed by raised floor systems to ensure longevity and performance. A sound foundation ensures the long-term performance and durability of raised access floors.
Unbox Your Kit
Now comes the exciting part—opening your raised access floor kits! Most kits contain everything needed for installation, including floor panels, pedestals, and detailed instructions. Before beginning to assemble your set, make a list of each component to check that none has been lost during transport or damaged during shipping.
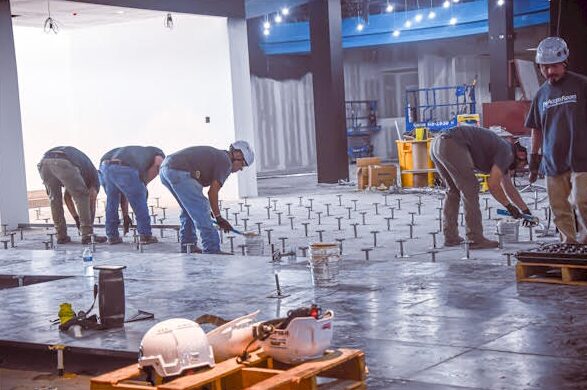
Installation of Pedestals
Follow your installation manual’s directions for placing and adjusting these legs until an even surface is reached – an essential step that ensures its long-term integrity and sustainability.
Panel Installation
Once the pedestals have been set in place, it’s time to begin installing floor panels. Various materials, like wood core or aluminum, offer different advantages depending on what application they will serve best. Assemble them onto their pedestals carefully while ensuring all edges fit together uniformly.
Cable Management
Effective cable management is one of the most significant advantages of raised access floors. As you install panels, use the space beneath to organize and route cables efficiently, ensuring a clutter-free operation that helps you with future upgrades or maintenance needs.
Finishing Touches
Once the panels have been assembled, it’s time for the finishing touches. Secure them to their pedestals to provide stability and create a uniform surface according to your specific requirements.
Final Checks
Before concluding the installation process, take some time to double check your raised access floor system installation. Double-check that all panels and cables are securely in their places and that the surface remains level and stable. This final inspection should ensure your raised access floor meets your environment’s demands.
Installing Raised Access Floor Kits Properly Makes The Difference
Unboxing and installing raised access floor kits may seem intimidating at first, but with proper preparation and guidance, it can become an effortless experience. Simply follow these steps as outlined by your installation manual to maximize the benefits a raised access floor provides.