Table of Contents
What is Composite Decking
Many people do not understand what Composite Decking is, and do not know how to install and maintain Composite Decking, so they do not know how to choose between Composite Decking and Wood Decking. In this article, we will explain the matters that need to be paid attention to in terms of installation and maintenance of Composite Decking.
Composite Decking Definition
Composite Decking is a man-made building product made of wood fibers, plastic and a small amount of binder. Wood Plastic Composite (WPC) is a type of eco-friendly material made of reclaimed wood fiber and polymers.
Composite Decking Classification
Composite Decking is usually divided into two categories: uncapped composite and capped composite. Uncapped composite is most prone to mold due to its exposed wood composition. The capped composite is sealed in a plastic housing for higher protection.
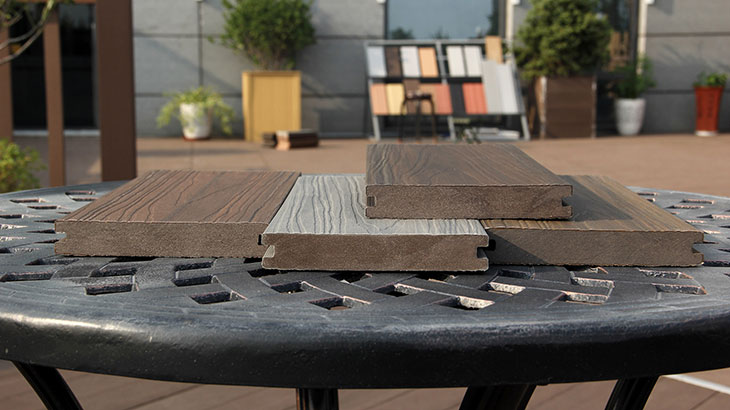
Hollow vs Solid
There are two types of composite decking, hollow and solid. Hollow core boards tend to have hollow chambers running the length of the board, while solid boards are stronger and heavier.
Difference Between Composite Decking and Wood Decking
Composite Decking
Composite Decking can last 10 to 30 years if made from untreated wood, and up to 50 years with treated wood or composites. Because a deck is a long-term investment that you’ll enjoy for decades to come, it’s important to understand your choice of materials before starting your building project.
Both wood decking and composite decking materials are available in a variety of qualities, so cost or quality is not the only factor.
Composites are known to require less maintenance, so their cost is generally higher. But they do require some maintenance, and other factors come into play. Let’s take a look at some of the issues involved in choosing the right deck material for your deck.
Are you stuck between composite decking and wood decking for your project? At EVODEK, we know that choosing the right outdoor decor material for your project can be overwhelming for any shopper.
With all available trim options, product knowledge ensures you make the right investment. Discover the difference between Composite Decking and Wood Decking here.

Wood Decking
Thirty years ago, homeowners had limited decorative options beyond traditional wood. Most wood decks come in cedar, mahogany, or pressure-treated wood made from a variety of wood species.
Wood has maintained its popularity over the years as a familiar and affordable option. In 2020, lumber prices have skyrocketed by 130%. Now, homeowners must consider the maintenance, disadvantages, and higher cost of wood decks compared to alternatives.
What is Composite Decking?
Manufacturers introduced composite decking in the 1990s as an alternative to traditional wood decks. Unlike wood decks, wood composite decking are composed of synthetic and organic materials. Most composite decking contain a mixture of wood fibers, virgin or recycled plastic, and chemical additives.
For wood components, producers typically use sawdust, wood chips and other wood fibers.
Plastic components include one or more of three common plastics: polypropylene (PP), polyvinyl chloride (PVC) and/or polyethylene (PE). By adding chemical additives to improve durability, wood composite decks often have superior advantages over traditional wood decks.
Why Homeowners Choose Wood Composite Decking
In addition to the rapid increase in the price of wood decks, homeowners opt for wood composite decking to avoid maintenance. Unlike wood, wood composite decking do not require sanding, staining or painting. Wood composite panels offer longer life and less chance of splitting, splitting, cracking and rotting.
Composite deck boards still contain porous wood fibers that absorb moisture, discolor, stain, swell and breed bacteria.
Despite the plastic components and additives, composite decking are still susceptible to factors that inevitably deteriorate wood. Today’s homeowners have access to a premium alternative to wood and wood composite decking: EVODEK.
The best deck on the market
We designed EVODEK reinforced polymer wood to fill a gap in the laminate flooring industry. Our fully synthetic high density polyethylene (HDPE) decks outperform wood composite decks. EVODEK is low maintenance, heat reflective, waterproof, weatherproof and structural.
Because they do not contain organic materials, our boards are free from mold, mildew, insects and moisture. You can even build structures underwater without worrying about damaging our boards.
EVODEK has the highest live load rating in the industry with virtually no expansion and contraction. Want to see how we compare to parquet and other popular wood alternatives?
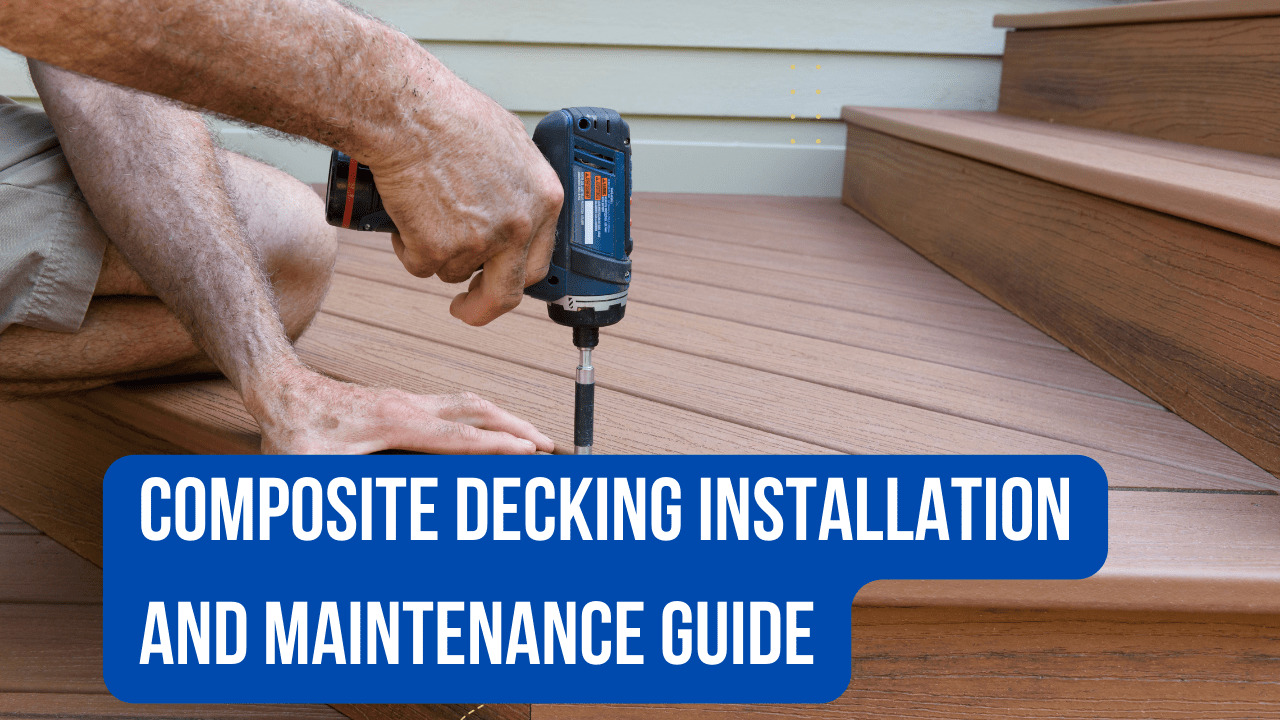
How to Install Composite Decking
Safety
When dealing with any type of construction project, it is necessary to wear appropriate safety equipment to avoid any risk of injuries. When handling, cutting, and installing, the following safety equipment is recommended but not limited to: gloves, a respiratory protection, long sleeves, pants, and safety glasses.
Tools
Standard woodworking tools may be used. It is recommended that all blades have a carbide tip. Standard stainless steel or acceptable coated deck screws and nails are recommended.
Environment
A clean, smooth, flat, and strong surface is needed to install WPC products correctly. Please check with local building codes before ever installing any type of decking. If installation does not occur immediately, WPC products need to be put on a flat surface at all times. Never ever should it be put on a surface that is NOT flat.
Planning
Plan a layout for your decking before starting it to ensure the best possible looking decking for your project. Building codes and zoning ordinances generally apply to permanent structures, meaning anything that is anchored to the ground or attached to the house.
So nearly every kind of decking requires permits and inspections from a local building department. We recommend drawing out a site plan of your proposed project that you intend to do to minimize errors and make your project perfect.
Construction
WPC product is NOT intended for use as columns, support posts, beams, joist stringers or other primary load bearing members. WPC products must be supported by a code-compliant substructure. While WPC products are great for retrofits, WPC products CANNOT be installed on existing decking boards.
Ventilation
WPC products CANNOT be directly installed onto a flat surface. It must be installed onto a substructure, so there is adequate and unobstructed air flow under the decking to prevent excessive water absorption.
A minimum of 25 mm (1 inch) of continuous net free area under the decking surface is required for adequate ventilation on all decking, so air can circulate between adjacent members to promote drainage and drying.
Heat & Fire
The continuous high temperature generated by fire or other heat sources will cause damage to outdoor decking. Therefore, do not install the decking near a heat source such as a fireplace.
Storage
Acclimating at least 2 days prior to installation is recommended. Acclimating the boards will get rid of any unwanted shrinkage issues seen during and after installation.
If the products won’t be used for a long time, please keep the package complete and store in a well ventilated and drained indoor environment, avoid direct sunlight and rainwater.
Products must be raised up by joist and stacked neatly on a even and solid ground. Uneven ground will cause the products to deform and warp. The spacing of each joist should be no more than 500mm. Do not store the products by putting on the ground directly.
During the construction, please cover products that are not in use to prevent the sand and gravel generated by the construction operation from falling on the surface and causing scratches by friction with the surface. Please lift and drop the products gently, and it is forbidden to drag or extract the products.
Ground Treatment
A smooth and solid ground base that ensures good ventilation and drainage is crucial to the longevity of the decking. Please exercise proper ground treatment methods according to the ground condition at the job site. Here are the tips for some specific ground conditions, such as sandy land, soft soil, and grassland:
- Build a concrete foundation. Dig holes in the ground with a suitable interval and depth below the frost line and then pour concrete in. They act as a foundation for lumber or metal framing. Then you can install the decking on the frame.
- Use ground screws. Fix the ground screws to the ground at a suitable interval. Fixing the metal framing to the ground screws. Then you can install the decking on the frame.
- Apply surface hardening treatment. Dig a depth of roughly 15-4/5’’(400mm) depth (depending on the soil quality) under the ground. Then, ram the soil, lay the waterproof material, surface it with gravels and concrete slates(or pour concrete directly). After that, lay the joists and install the decking.
No construction measures that could cause damage to the surface structure shall be adopted on rooftops, balconies, and patios , as the waterproof layer might be damaged or other safety concerns could result.
You can secure the joists with concrete before installing the decking. Joists must run in the direction of the pitch of the roof to facilitate proper drainage. If necessary, consult your local building code authority for information about the construction on roofs.
Decking Support Structure
Framing: It’s recommended that code-compliant materials, such as pressure-treated wood or metal tubes, be used for the framing. Please follow the manufacturer’s instructions for proper installation. The framing must be level without undulations, and the joist spacing should not exceed 14’’(350 mm).
Joist: WPC or Aluminum or joists may be used on the ground that has undergone a hardening treatment, provided that adequate ventilation and drainage are ensured.
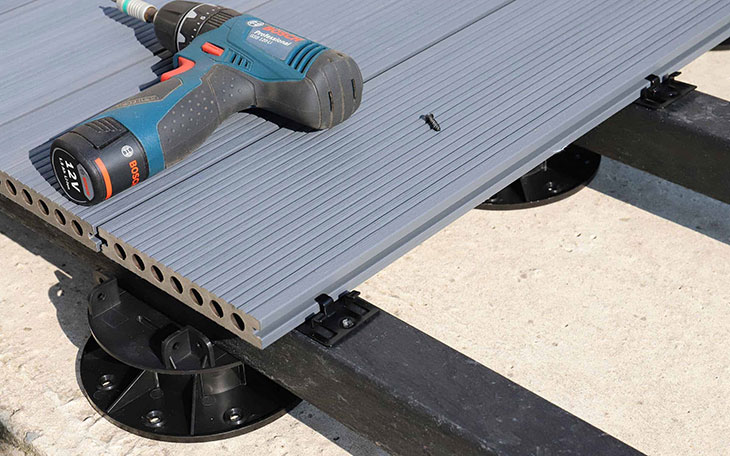
Overview
- Fix the joists to the ground with expansion screws, the joist spacing should not exceed 14″(350 mm). Double joists are needed at the end-to-end joint between decking boards.
- Install the start clip and slide the first decking board into the start clip.
- Slide the clip into the groove of the decking until they are on their respective joists.
- Secure the clip with screws.
- Reserve a proper gap at the butt of the two boards for contraction and expansion(Refer to THE RESERVE DECKING GAP on page 9 for details). Along the edge, toenail screw to secure the decking boards.
- Trim the L corner at a suitable angle and fix with screw. The spacing of the screws should be no more than 20″(500mm).
- NOTE: some important details is not fully displayed in the Over iew. recommend that you read the following detailed Installation Instructions carefully and thoroughly before starting your project. Please note that the limited warranty can only be valid based on the entire content of the Installation Instruction.
How to maintain Composite Decking
Points for Attention
- Ensure adequate ventilation under and between decking boards.
- lmprove drainage or soil grade to eliminate standing water under decks.
- Keep direct downspouts, downspout extensions vand splash guards away from decks.
- After rinsing the decking. It’s better to use a blower to make the deck dry.
- Clean your deck twice a year after the major pollen events.
- Please be careful when using a high-pressure cleaner, and please use it 12 inches above the deck surface at a pressure less than 1,500 psi.
- Keep blockages away from the gaps between the decks so the rain can wash the pollen and organic debris away.
- lt’s better not to put wet covering on the deck surface.
- Please place a vinyl-backed splash pad under the grill.
- Normal daily activities will not cause scratches,but excessive activity will damage the deck surface. Stepping on a skateboard, dragging heavy furniture, and dancing with thin heels may cause scratches, worn, or chipped.
- lt’s better to install a fixed pad under the outdoor chair to prevent continuous drag and wear overtime.
- Never use a METAL shovel to remove ice or snow from the deck.
- Use mild detergents for cleaning – avoid strong products like bleach,CLR,sugar soap, etc.
- During masonry construction, please cover the deck to avoid concrete or gypsum leaving on the deck. If concrete and gypsum plaster left on the deck, they will mix with water or evaporate and create white stains on the deck’s surface. We recommend to install the new decks after all the construction works have been completed.
- The oil / grease / food and stains like red wine on the deck surface should be removed in time.
Cleaning & Care Guides
| Problem | Solution |
| Dirt and Debris | You can follow the direction of the wood grain and use warm soapy water and a soft brush to clean the dirt or debris on the surface.Then wash them off with the hose. |
| Tannins | When organic matter gets stuck in the gap between the decks and water starts to collect under the decks, tannins will be formed.Therefore, it is best to use a hose, spatula or soft broom to remove debris from the gap. Keeping the gap clean will reduce the chance of forming tannins. |
| lce and Snow | Use calcium chloride or rock salt to melt snow and ice. Calcium chloride and rock salt may be formed and leaving a white residue, which can be removed with warm soapy water and a soft brush. |
| Oil / Grease / Food | All grease / food spills must be removed in time. Please use warm soapy water and a soft brush. lf warm soapy water and a soft brush do not work, special cleaner maybe needed. When buying the cleaner, please make sure it is suitable to use on the decks. |
| Mould and Mildew | ln the daily environment, mold and mildew occur regularly. If high temperature, air, water, rotten organic matter, rotten leaves or pollen mixed together, mold and mildew will appear on the deck. Mold cannot be completely eliminated, therefore, we can only minimize the occurrence of mold by removing these decaying organic substances as soon as possible. If there is mold, please use warm soapy water and a soft brush to clean it. |
| Heat / Fire | WPC decking has a tendency to keep the heat whenever it contact heat or ignition sources directly or indirectly. Heat and fire can damage the surface of the deck. Please keep heat and ignition sources away from the deck. |
| Masonry/Concrete/Gypsum plaster | During masonry construction or any construction involving concrete and gypsum plaster, the decks must always be covered. it is best to cover the floor with a piece of tarpaulin or architectural grade plastic film.The remaining minerals during construction may mix with water and evaporate and form white stains on the surface.Gypsum and concrete contain substances that can damage the deck (ie lime).To avoid these problems, be sure to protect the floor during construction. If mineral deposits remain on the deck surface, regular maintenance is required to maintain the original appearance of the deck. |
How to clean your decking?
- Firstly, use a broom to remove the leaves and debris from the surface. A brush is also needed to remove the accumulations of moss, leaves or algae. In this way, you can make the surface of the decking clean.
- Put the warm soapy water or cleaner on the decking. Then, use the broom to scrub the surface of the decking. The debris will be cleaned up.
- Prepare a bucket of warm soapy water or a bottle of composite decking cleaner.
- Remember to leave the warm soapy water or cleaner on the surface for several minutes before rinsing the boards. Ensure all the dirty and debris can be removed from the boards.
WPC Decking Cleaning Guide
Deposit will appear on the surface of the deck without regular cleaning. The appearance of these deposits is due to the mixing of rainwater with the soil / dirt, etc. When it evaporates on the deck, it will form stains on the deck, and if the stains be cleaned in time, it can be removed. If they are not cleaned in time, they will be difficult to be removed.
Note: In certain environments,minerals will appear more rapidly and may become serious.To keep mineral from reappearing, we recommend to clean the boards at least once every 2 months.
ln this guide we will show you how to clean the deposit on the deck surface.
The following cleaners are recommended to wash off the minerals:
1.Vinegar
2.Household/Laundry Detergent
Note: Do not use any other cleaner that is not recommended because it may potentially damage the deck’s surface. Also, never use different cleaners together. Only use one of the choices as above.
NEVER MIX THE CLEANERS.
Materials/Cleaners
- Towel
- Bucket
- Water
- Brush or Broom
- Gloves
Note: Always wear gloves when dealing with cleaners.
Cleaning Guideline Option 1: Vinegar
Refer to Picture 1 (on the previous page) you can see the boards with deposits on the surface. We can use a mixture of water and vinegar to clean them off.
- First we will need to make a 50/50 mixture of vinegar and water. Add the water into a bucket as shown in Picture 3.
- Then, add the same amount of vinegar to that bucket as shown in Picture 4.
- Make the water and vinegar completely mixed together, then put the mixture onto the decks, as shown in Picture 5.
- Leave the mixture on the surface for at least 5 minutes to let them get deep into the deposits. Then, the deposits will be easier to be cleaned up.
- Use the brush to scrub the decking.The strength of the scrubbing will depend on how thick the mineral deposit is – usually medium strength scrubbing is sufficient.
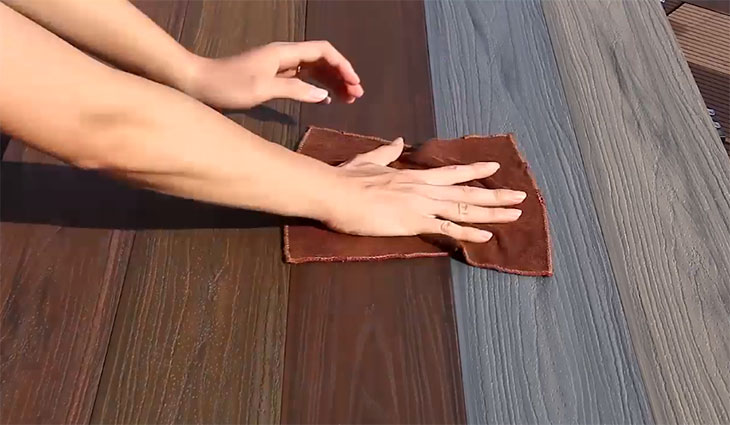
- About 1-2 minutes after scrubbing, please take some water to rinse the area and then dry the area with a towel.
- After drying, the stained decks will look original. As seen in Picture 6, you can see the difference between the area cleaned versus area not cleaned.
Note: In order to remove the mineral deposits from the surface, it may need to scrub the deck multiple times.
ln addition, if you put the mixture on the mineral deposits area and scrub some more times, the stains will return to original soon.
Cleaning Guideline Option 2: Household/Laundry Detergent
- Please put the detergent on the decks as shown in Picture 7.
- Please put some water on the detergent and then wipe the deck.Let it stand for at least 5 minutes,as shown in Picture 8.
- At least 5 minutes later, please scrub the deck with the brush at the direction of the wood grain.
- 1-2 minutes later, please rinse the area with water and dry with a towel to see the results, as shown in Picture 9.
Note: In order to remove the mineral deposits from the surface, it may need to scrub the deck multiple times.
ln addition, if you put the detergent on the mineral deposits area and scrub some more times, the stains will return to original soon.
Maintenance
How to treat the scratches on the deck with sanding surface?
Decking floor with scratches
lt is possible to cause some scratches on the deck surface during a long time using. The scratches maybe caused by the pets or sharp objects. But these scratches can be easily removed in the following steps.
Use the abrasive paper to polish the scratched places evenly.
A piece of abrasive paper is required.
With the abrasive paper we can make the scratches form deep to light and then disappeared, Then, clean up the debris, the deck will like new again.