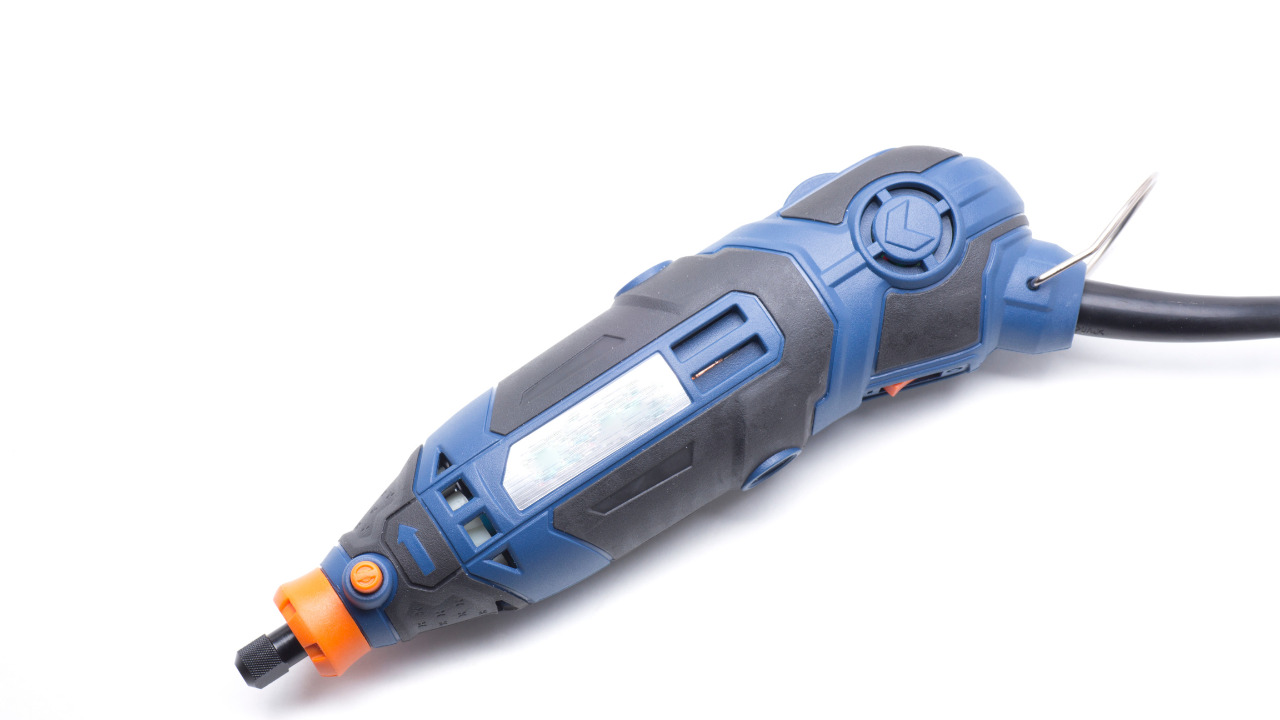
The hinges are the most critical aspect to consider when installing a door. To correctly install the door, you must first cut away the hinges. If you don’t, your simple project will become more challenging. The Dremel is a multifunctional handheld power tool used by experts and amateurs.
The Dremel morphs into a surface router with the plunge router attachment, which can manage the detail of many modest jobs. Using the Dremel to install door hinges is a quick and precise process. You’ll need basic knowledge of the tools and the processes if you want to install your door independently.
You’ve come to the right place if you think you need assistance. We’ll show you how to cut door hinges out in this post.
Table of Contents
Steps To Cut Door Hinges With A Dremel
We’ve got you covered if you’re wondering how to cut off a door hinge using a Dremel. We’ve broken down the steps below so you can follow them more easily.
The guide below can assist you in doing it for the first or tenth time.
Gather Your Tools
- Tape measure
- A utility knife
- Dremel
- Power drill
- Pencil
Mark The Points On Door For Hinges

To locate the hinges on the door, make a mark on it. Place the door on its side, facing upward, with the hinged side facing up. With the tape measure, measure the distance from the top of the door to the pencil mark. Resting the set square in line with your mark, create a straight line perpendicular to the spine of the door.
Using the set square and pencil, measure from the bottom of the door to the spine and draw a straight line perpendicular to it. The smaller panels indicate the top of the door if you’re installing a panel door.
Use A Utility Knife To Trace Outline On the Wood
Make the necessary preparations for routing the wood. Place one of the hinges on the door’s spine so that the upper end is parallel to the pencil line. The hinge should be folded over the door’s edge, acting as an axis for opening.
Trace the three-sided outline of the hinge into the wood with your utility knife while holding it firmly in place. Maintain proximity between the blade and the hinge. Apply hard pressure to the blade in three passes. Outline the other hinge by repeating the technique.
Prepare Your Dremel For Routing
Make sure the Dremel is ready to go before you start routing. Insert the Dremel router bit into the spindle of the Dremel. Use a Dremel wrench to tighten the spindle. Connect the Dremel to the plunge router body. Utilizing the tape measure, determine the width of the hinges you’ll use.
Loosen the knob that regulates the router bit’s height until the bit’s cutting depth is the same as the width of your hinges.
Use Dremel For Routing
With the Dremel, route the housings of the hinges. Place the body of the plunge router on top of the hinge. Plunge the plunging body into the hinge area with the Dremel until the bit is fully inserted. Stay as close to the pencil outline as possible during routing. Remove all of the wood within the outline.

Turn off the router and use a compressed air hose to blast dust or wood chips. You can check the fit with the metal hinge. Stop routing when the hinge is flush and secure in the hole. Carry on in the same manner with the other hinge.
Screw The Hinges
Fix the hinges. Using the electric screwdriver and the screws that come with the hinge set, screw the hinges into their housings.

To keep the hinge square, tighten the middle screw first. With a router attachment, you can quickly install door hinges using a Dremel machine. The Dremel can be converted into a surface router with the help of the router attachment.
This can manage the speed and precision of various minor activities. Mounting door hinges is much easier using a Dremel.
Alternative Ways To Cut Door Hinges
1) Use A Chisel
Collect Your Supplies
- Chisel
- Tape measure
- Hammer
- Pencil
- Screwdriver
- A Utility Knife
Position Your Hinges On The Door

Your door should be placed so that the back border is easily seen. Put one of the hinge’s ends where you’ll be installing it. Typically, top hinges are placed below the top of the door, middle hinges are placed exactly in the center, and bottom hinges are placed above the bottom.
Mark The Position Of The Hinges
Affix your hinge flat to the door. Ensure that all three hinge ends are in contact with the door. With a pencil, trace the three edges. These lines need to be straight because you’ll use them as a guide in the following steps.
After that, use the pencil to indicate the mortise’s depth. The hinge portion, known as the mortise, is situated above the fourth edge and bends downward. Mark the spot where the line comes to an end at the door.
Mark The Cutting Spots With A Utility Knife
Remove the hinge after making it simple to read the outline. Take a utility knife, extend the blade, and move it along the line you drew. As a result, the surface of the door will develop grooves.
To make the incision visible, repeatedly cut through the outline with the utility knife. Use this technique also to cut the mortise spot.
Start Cutting With A Chisel
To begin tapping a chisel’s back with a mallet, place it on top of the scored outline. Continue applying mild blows until the groove’s depth equals that of the door hinge. Follow the same procedure for each of the outline’s four sides. Shortly after you keep doing that, the tiny wood shavings will start to emerge.

Before removing all the groves, you shouldn’t dirty your hands with the shavings. Once you’ve finished, scrape the mortise and remove the shavings with your chisel.
2) Use A Forstner Bit

Gather Your Supplies
- A Forstner bit
- Power drill
- Tape measure
- Pencil
- A utility knife
Measure The Spots And Mark The Lines On The Door
In the same manner, as in the first step of the prior approach, secure the hinge against your door. Outline the hinge with a pencil. Ascertain that the pencil traces are substantial and obvious.
Mark The Cut Depth
Ensure that the drill’s depth matches the depth of your hinge. You don’t want to go any deeper than is necessary.
Start Cutting
Activate the drill, then begin cutting along the outline. Continually move slowly. Drilling should begin at the beginning and extend outward to the edges. Making a mortise cut won’t take more than a minute. Use a chisel to smooth the jagged edges after cutting.

While the drill may also be used to polish them, the chisel gives you greater control and improves accuracy overall.
Conclusion
You can see how beneficial a Dremel system is for cutting off a door hinge in this way. It speeds up your work and allows you to complete your assignment accurately. Using a Dremel to cut off door hinges should be easier now.
Hopefully, this article will help you cut or install door hinges yourself using a Dremel effortlessly. If you are still unfamiliar with using a Dremel, it would be best to hire a professional. But the choice is still yours!