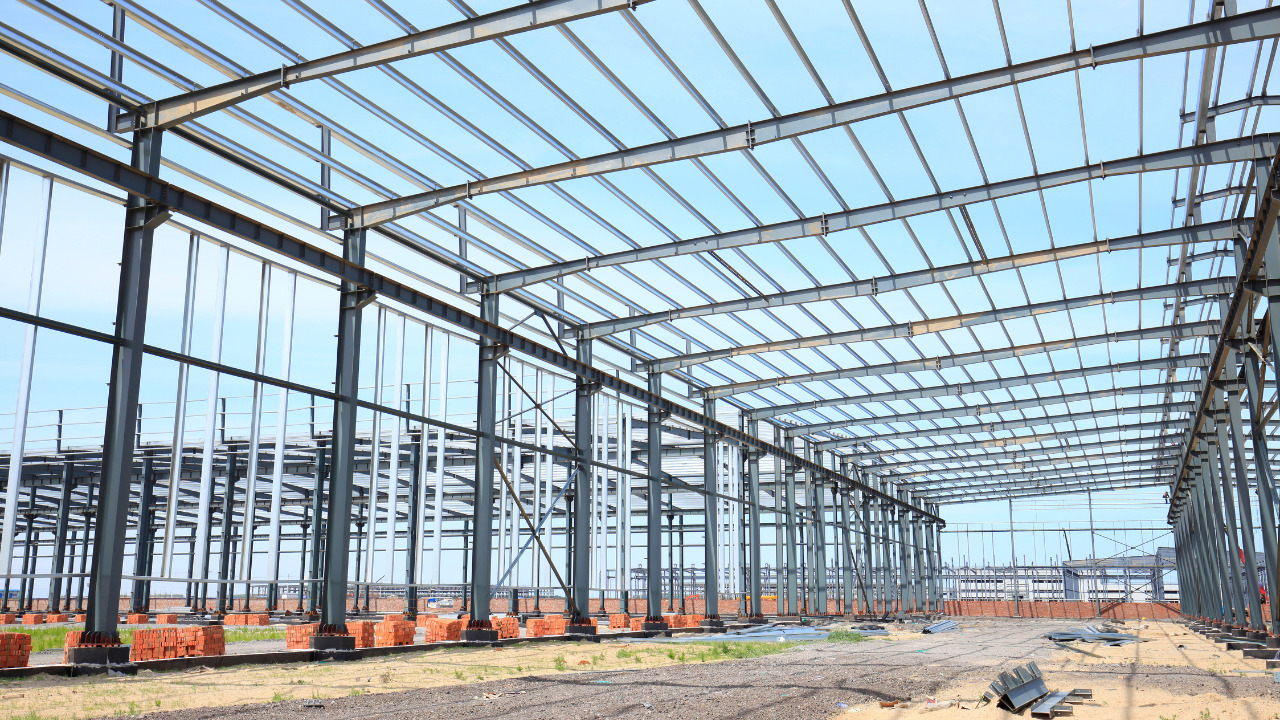
It can be simple to ignore the significant responsibility that is bracing bears when focusing on the work that prefabricated trusses do and the simplicity of their installation. Trussed rafters are braced to provide a strong, safe, and stable roof structure.
If the bracing is not fully utilized, is positioned inappropriately, or is not securely fastened, it could, in the worst situation, cause individual trusses to warp. Gable walls must be attached to the roof structure, and bracing must be done correctly for the roof structure to be complete.
Trusses for the roof must be treated carefully and bottom up. Although they can tolerate vertical pressure, they cannot withstand horizontal pressure. Two to three people can install a small crew of trusses. However, trusses great in length must be installed using a bracing system that has been expertly constructed.
Table of Contents
Steps To Brace Roof Trusses
Measure Roof Trusses
Plan how many trusses you’ll need by measuring the space to be framed—plan for the ad hoc constraints necessary to brace the trusses during framing. The trusses’ span determines how far apart to place them and how to secure them.
The Structural Building Components Association’s guidelines and manufacturer’s requirements should be reviewed. Prefabricated trusses may be delivered with boards separating them if you buy them. To aid installation, mark anchor locations.
Lift Trusses
A second or third person is required to hoist a truss onto a single-story roof. The inside of the trusses should ideally be braced before handling. To hold the truss upright, use a t-brace. A gable truss should have braces vertically nailed along the top and bottom.
Place the truss on a corner of the roof surface while it is upside down. Use a 2×4 as a ramp if necessary as you raise the remaining truss. A crane might be necessary to lift trusses to two stories high.
Install The First Truss
The installation’s initial truss must be secured inside or outside the structure. Bracing the truss inside if the ground isn’t level outside the structure. Start the installation process in a sturdy location, such as a braced gable end or girder offset.
Install Bracing
Once temporary lateral and diagonal bracing is in place, keep the trusses in position. The top chord’s temporary lateral restraint placement can be found in the manufacturer’s specifications. At pitch breaks, locate extra restraints and attach vertical braces there.
After the initial truss, each one should be placed with its top chord’s temporary lateral restraint in line with the ground bracing. As interim lateral constraints between the trusses, use metal or wooden braces that have been prefabricated. Each of these shackles is secured with two nails.
Install web member and top chord diagonal bracing to create triangles perpendicular to the truss’s plane. Install the diagonal bracing and lateral restraints on the bottom chord.
Connect Trusses
To increase stability, connect the end jacks to the wall and girder as soon as possible during installation. The trusses can be firmly connected to the bearings using hangers and tie downs. Install plywood roof sheathing over the truss by attaching panels with nails or H-clips.
Types of Truss Bracing
Longitudinal Bracing
Along the length of the structure, longitudinal bracing is consistently straight-lined through parallel trusses. Bracing is lap joined over at least two trusses as necessary. Our best advice is to leave space between the rafter and the end of the longitudinal bracing so that the diagonal brace may be fastened.
Diagonal Bracing
Extends the entire truss length from the apex to the wall plate and must make strong contact with the wall plate until the ridge. With attic and elevated tie trussed roofs, installation of this is very crucial.
In no case should it be skipped? To make place for the plasterboard to be fixed, you must batten out the room and the skeiling regions. The diagonal rafter bracing may be eliminated because the sarking is fastened directly to the top of the roof trusses.
If you are somewhere else, kindly let your designer know, as this place additional loading on the trusses that must be considered.
Chevron And Ceiling Bracing
Whenever this kind of bracing is required, it normally extends over a minimum of three truss webs at an angle of around 45 degrees. When no plasterboard is immediately connected to the underside of the truss, ceiling bracing is only mentioned in our designs.
There are three primary forms of bracing. However, they can have different layouts based on the size, type, and quantity of webs in the truss, among other things.
Bottom Line
We trust that this article has aided you in understanding the complexity and significance of bracing when properly constructing your trusses, so they are structurally strong. Remember that we will always supply you with a bracing strategy specific to your project and that we have created for you.