When it comes to enhancing the visual appeal of your house, wall texture comes as a great option. Texturing walls to make them look beautiful and useful is not a new idea. For hundreds of years, people have been using different types of wall textures to make your space more aesthetic, stylish, and up-to-date.
No matter if your wall has architectural defects or multiple cracks then wall texture is the cheapest option for you. For all these reasons, wall texture is important and is widely chosen by homeowners. The best part about wall textures is that you can DIY wall texture with minimal effort after choosing the right type of texture for your wall.
Let’s talk more about the wall textures below.
Table of Contents
11 Different Types of Wall Textures and How to Do Them
If you are just considering the wall texture an option for your home, then the following are some of the popular types of wall texture and complete guidelines of their application.
Comb Texture
As the name shows, this texture gives your wall comb-like straight lines. It is quite simple among the different types of wall textures. To get the combed texture, you have to use certain methods to make lines in the plasterboard material that are of different widths and shapes.
This is one of the easier ways to add texture because it is often used to make repeating rainbow patterns on plasterboard. You’ll need a plasterboard compound, a roller, and a plasterboard trowel with teeth that are spaced evenly or unevenly, based on the pattern you want to make. This style is very flexible and looks great in rooms giving a unique look.

How to Apply Comb Texture
First, use a roller to put the plasterboard paste on the wall. After that, make slight lines in the wet material with the trowel’s teeth. You can make different styles, like bigger arcs that look like a rainbow, overlapping concentric circles, or the trendy half-fan shape that looks like fish scales.
If you want to make perfect concentric circles, you should practice on an extra piece of plasterboard first. Let the pattern dry for 24 hours before you paint or prime the surface.
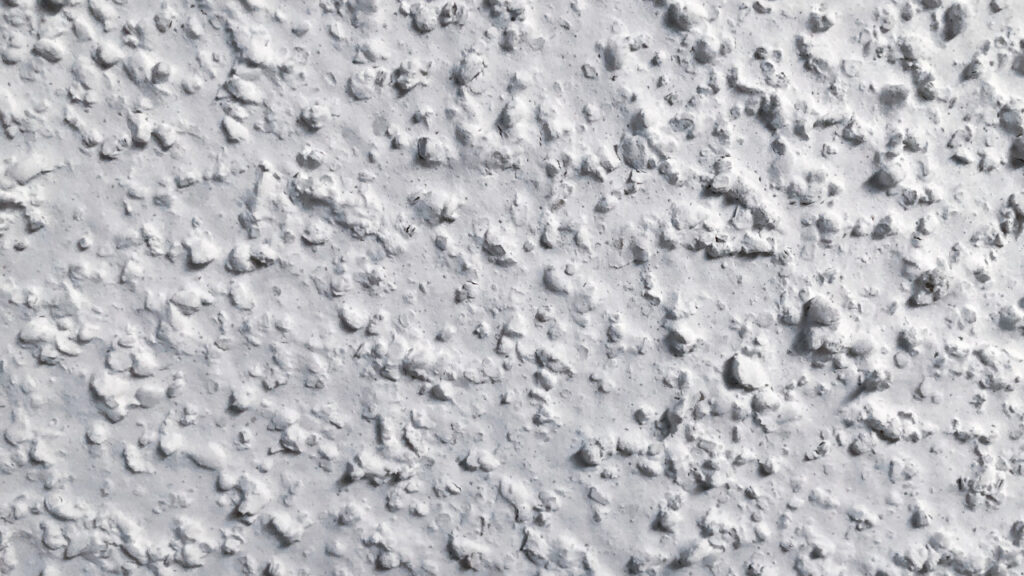
Popcorn Texture
Popcorn texture is also known as “acoustic texture”. Just like popcorn ceilings, it blocks out external noise. It is often used in places with speakers or other sound equipment, like bedrooms and living rooms. Back in the 1960s, this wall texture became very popular for many reasons. Because it quickly covered up flaws, and homes liked that it didn’t need much upkeep and didn’t need to be painted or touched up often.
There is an easy and inexpensive way to get the feel of popcorn that you can do yourself. Popcorn texture is a dry mix of plasterboard mud and styrofoam. You will also need an air compressor and a hopper gun. You can easily rent these tools from your nearest store. It’s best to prime the ceiling or wall before applying.
How to Apply Popcorn Texture
Follow the directions on the package to mix the popcorn texture with water. Then, use a compressor and spray gun to spread the mud-like mixture that you’ve made. To avoid a mess, cover anything that shouldn’t be sprayed. You can paint the pattern any color you want after it dries. Remember that getting rid of the popcorn texture can be hard, so make sure you like this style before sticking to it.
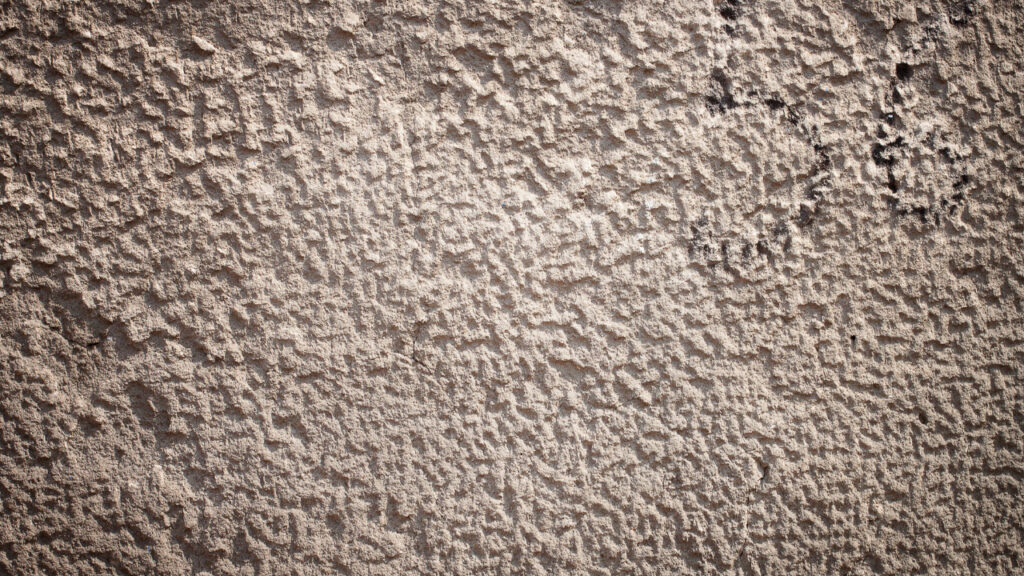
Orange Peel
The orange peel wall texture is a classic flat wall texture type. Because it looks and feels just like the peel of an orange. It is much simpler to apply. The texture’s subtle bumpiness makes it a timeless option that works well in a variety of settings, including bedrooms, workplaces, game rooms, and studies. Make sure your walls are spotless, sanded, and primed before attempting the orange peel texture.
How to Apply Orange Peel Wall Texture
Apply plasterboard mud with a spray gun and compressor after mixing it with water until it reaches a thick liquid consistency. Use a roller to spread the wet mud, and then, once the first coating has dried, do it again with a second, thicker coat. Alternatively, you can use an air compressor and a hopper gun with a valve that enables you to modify the amount of air being released.
Spray the compound on the wall in a small splash, adjusting the air valve to get the desired pattern, until the mixture reaches the consistency of thick paint. The textured walls should be primed and painted a base color before being decorated. Both techniques will give your walls that timeless and stylish orange peel look.
Knockdown Texture
The knockdown texture is almost similar to orange peel, and its application method is quite the same. For knockdown, you use a trowel or finish knife to smooth out any bumps in the texture. This makes the texture flat. The end result looks more pronounced than the orange peel walls. As you add one more step to the orange peel method in order to do the knockdown technique.
How to Apply Knock-Down Texture
First, give the walls an orange peel texture. Next, use a big knockdown knife to smooth out the bumps in the drywall compound. You should wait 10 to 15 minutes after spraying in smaller rooms before beginning the smoothing process. If the room is bigger, you can probably start right away after finishing the spray.
Just make sure to start smoothing where you started spraying. Pressing is very important; if you do it too early, the knife might leave lines. This means you should stop and wait five or ten minutes before trying again. Once you’ve smoothed out all the bumps in the orange peel texture, let the wall dry overnight before sanding and painting it.
Spray Sand
The texture of a spray-sand wall is a lot like orange peel, but there aren’t any cracks that you can see. The biggest difference is in the types of materials used and how they are applied. Most of the time, the choice between orange peel and spray sand comes down to how you want to use it.

How to Apply Spray Sand Wall Texture
First, mix sand with water or paint. Then, let it sit overnight so the sand can settle. Use a spray gun to put the liquid on the wall the next day. Putting down spray sand may take a long time and a lot of care, but the end result is a strong and even surface.
Sand Swirl Texture
A compound known as Perlite is used in sand swirl texture. First, mix sand with water or paint and let it sit overnight. The next day, use this mix to cover the walls in a fan shape, like when you make comb textures. You should use a thick bristle brush instead of a toothed shovel. You can also use a normal paintbrush if you want to try out different prints. Don’t prime or paint the walls before 24 hours of drying period. This will give an amazing look to your child’s room.
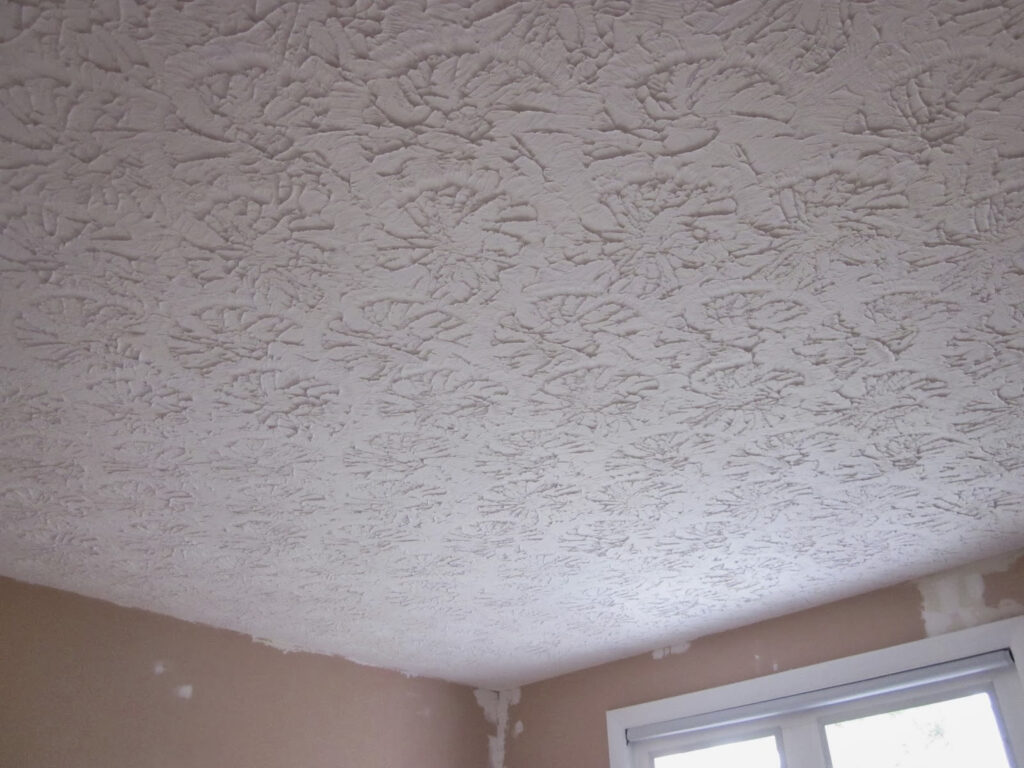
Slap Brush Texture
Another type of wall texture is the slap brush which is also known as a crow’s feet or stomp brush. This is an easy-to-make texture that can be created using drywall material; With its random thin lines, the slap brush texture gives your walls a unique look that makes any room stand out. This way of adding texture is great for people who don’t feel safe using a spray gun. All you need is a roller, plasterboard solution, and a special type of brush for texture called a slap brush.
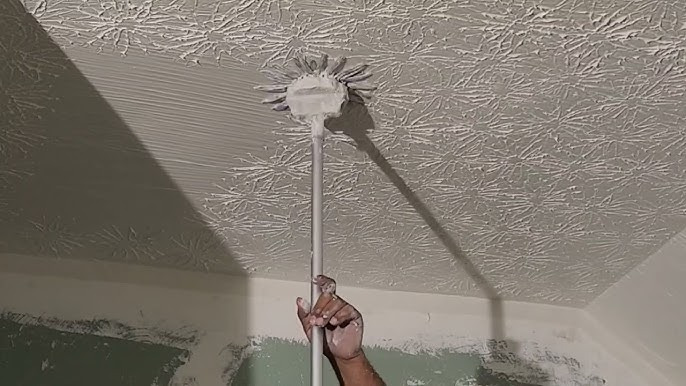
How to Apply Slap Brush Texture
To use, add water to the compound and mix it until it becomes thick like paint. Then, roll it out evenly on the wall. Before using the slap brush, work in 5-foot-wide areas and cover it on both sides with a plasterboard compound. Since there is no set plan to follow, the process lets you be creative by trying out different slapping angles. Wait 24 hours after finishing each part before priming and painting the room.
Slap Brush Knockdown
Another wall texture type to consider is slap-brush knockdown. When you mix the slap brush method with the smoothing part of the knockdown texture, you get a slap brush knockdown texture. This makes the design look sloppy, with wider, flatter lines instead of thin, pointed ones. All you need is plasterboard cement, a roller, a slap brush, and a knockdown knife, to make this texture.
To paint each wall evenly, use the slap brush method. If it’s a small room, wait 10 to 15 minutes before you use the drop knife to make the lines flat. Take care not to begin the process too quickly, otherwise, a line from the knife could end up appearing on the wall’s texture. If that happens, you should stop and wait five to ten minutes before going on. You can start straightening the lines right away in bigger places. Once you’ve smoothed out the lines on the walls, wait 24 hours before priming.
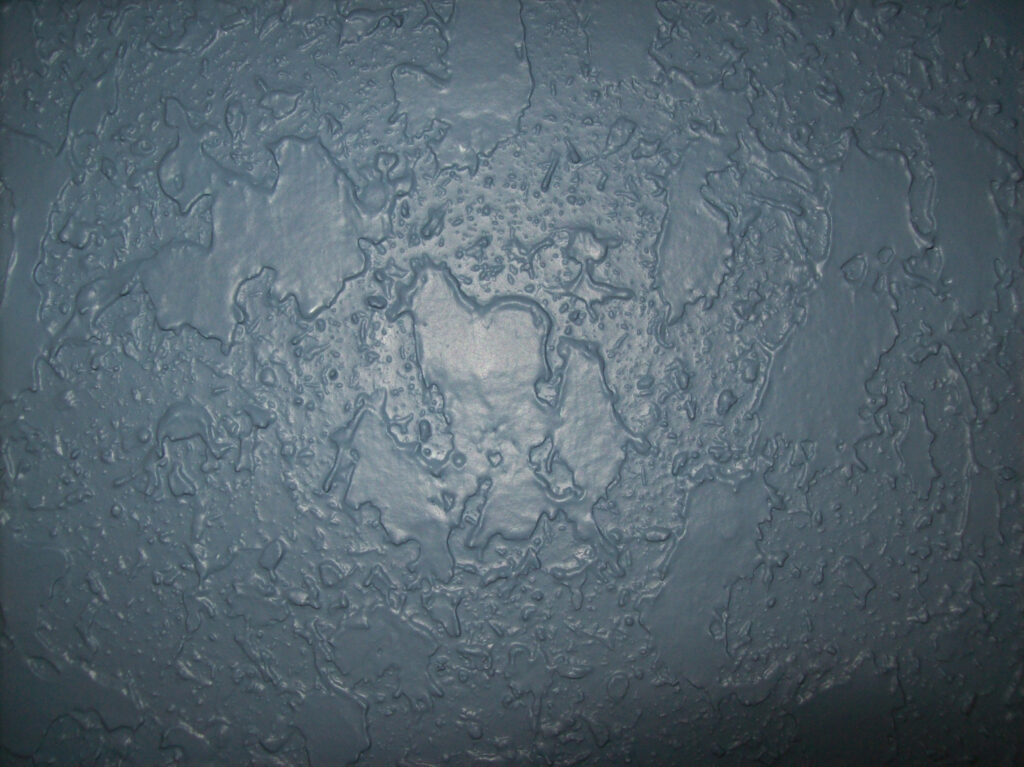
Spanish Lace
Another type of wall texture is Spanish Lace. It can be hard to make Spanish lace, a classy and beautiful wall texture. This lace pattern comes in both light and dark tones, and many people use it to hide flaws, cracks, and other flaws. Spanish lace is one of the most detailed and pretty flat wall texture types, and it’s a great choice for a house that needs work.
Lace texture is a very pretty variation of the slap-brush knockdown style that has a lot of individuality. You can use batter-thin plasterboard mud, just like you would for the slap brush method, but you could also use a roller or spray gun to spread it.
You can use a knife to make patterns if the mud is still wet. Then use any color paint to cover up your textured drawings. After that layer is dry, you’ll have to do the whole process all over again. Make a slightly different lace design to make things more interesting. Paint over the pattern again with a lighter shade of the same color to finish the look.
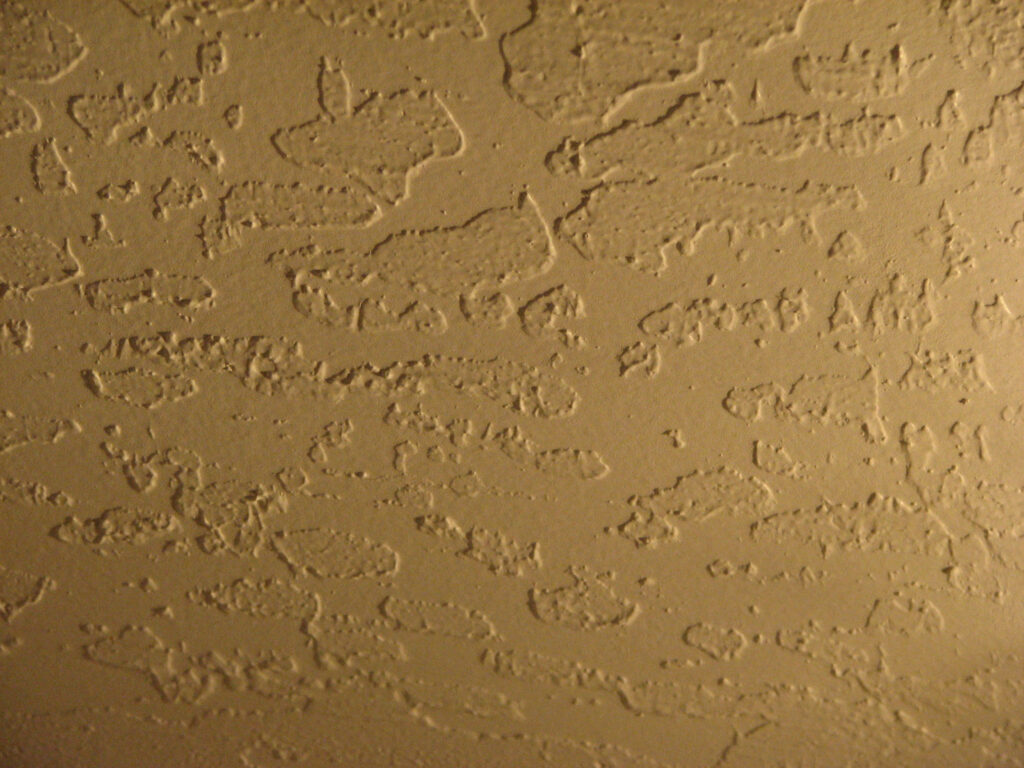
Skip Trowel
Another way to make your wall look different is to use a skip shovel and mud or plaster. The unique and artistic effect is worth the work, even though it can be hard to make. It takes time because you have to spread the plaster or plasterboard mud by hand to get this texture.
Spread out very thin pieces of the material you want to use with a big, curved knife. Next, hold the knife at an angle and skip it back and forth across the wall in rings that touch each other. The last step is to pick up some of the texture with a clean shovel held at an angle while the mud is still wet. Leave the rest of the texture separated. This flat wall texture type will give a dramatic look to your room.
Venetian Plaster Finish
Last but not least in wall texture types is the Venetian plaster finish. To make Venetian plaster, mix plaster with marble dust and then spread it on in thin layers with a brush. It can be used on walls and ceilings. After that, various steps are followed to make a smooth, shiny surface that gives your home more character. This material is sometimes used in well-known buildings all over the world, like museums and other amazing architectural spots.
How to Apply Venetian Plaster Finish
You can make a simpler version of Venetian plaster by mixing plaster, marble dust, and water into a clay-like substance. Use a steel trowel to put a thin layer on the wall, making sure to change the length and direction of each stroke.
Avoid patterns, and make sure your strokes meet to cover a lot of ground. Leave it to dry for five hours before you sand and buff the surface. Repeat the process for 6-7 times. Wait for the clay to dry, and then sand and buff it between each layer. When it’s done, there will be a lot of different textures and shades of color, and some spots will be so smooth they’ll look like they shine.
Choosing the Best Texture for Walls
Texturing your walls on your own is therapeutic. You spend your leisure time in a more useful way which not only saves you money but also gives you a chance to forget your real-life problems and indulge in some fruitful activity. Wall texturing saves you from the pain and mess of season-wise paint sessions as well.
Different types of wall texture have been explained above and their technicalities while applying are also mentioned. Your wall texture will definitely depend on your requirements, whether you want it for a study room, bedroom, or living area. Now, it’s totally up to you to choose the best among the rest of the flat wall texture types, as per your space requirements.