By extending the style of your fascia over the rest of the cabinet, the addition of end panels offers your kitchen cabinets a clean look. They’re simple to assemble and add a nice touch to any room. This is exactly what if you want to know about “how to finish cabinet ends?”.
You can replace the basic white end panel in the cabinet pack with the colored end panel to give a smooth finish to the cabinets. It doesn’t matter if you buy RTA (ready-to-assemble) kitchen cabinets or build them yourself with a proper cabinet layout; you still need to focus on finishing.
The tiniest touches make the largest impact on how professional your kitchen cabinet looks. In other words, you’re not finished yet after hanging your cabinets. You may also have to learn how to finish the inside of cabinets for a sleek look.
Many homeowners are unaware that they have various options when they search for how to finish cabinet ends, especially when they install cabinets themselves. Luckily! You can end a cabinet in several ways using your own creativity and DIY skills.
This guide answers all your questions if you are still searching for how to finish unfinished cabinets!
Table of Contents
How to Finish Cabinet Ends Professionally?
As I mentioned above, there are several ways to finish the cabinet ends. The basic purpose of finishing the cabinet ends is to give your kitchen a smooth and sleek look, especially while working on a kitchen remodeling project. So, let’s discuss a few creative ways to finish cabinet ends;
1) Non-Flush Finished Ends

A non-flush dead end is a simplest and most cost-effective option. On the side, there will be a 14″ scribe. Some contractors prefer to use this scribe on the sides of cabinets that will be butted against a wall since it allows them to shave up to 14 inches off the cabinet if the walls aren’t completely square.
The sort of finished cabinet treatment you select for the ends of your kitchen cabinets can significantly impact the appearance of your freshly remodeled kitchen.
2) Flush Finished Ends
Because the side of the cabinet is flush with the outer edge of the face frame, there is no scribe on the side of a flush-finished end. On the side of the cabinet, you can see the seam where the two parts meet.
3) Measured Finished Cabinet Ends

A measured dead end is similar to a flush finished end, except that the seam where the side of the cabinet meets The face frame of the cabinet is at the corner. Thus there is no visible seam. This is a wonderful solution for cabinet corners that stand out from the rest of the cabinetry or cabinets that are visible from the side.
4) Decorative Ends and Moldings
On the side of the cabinet, a decorative end places a panel that mimics the door design. If you have a metered door style, this will always be created with mortise and tenon construction to be close but not an identical door reproduction.

Decorative cabinet molding is another technique to consider if you are looking for “how to finish cabinet ends?” and add detail to your cabinetry. In most kitchen installations, two-piece crown molding is employed. It gives your cabinetry a sleek, finished appearance.
Use an under-cabinet crown or light rail molding to add a decorative feature to the bottom of the cabinet. It can also conceal under-cabinet lighting and any electrical outlet strips that may be placed.
5) Finish Cabinet Ends by Fixing a Door
This final game adds a real door to the side of your cabinet, but only as decoration. This could be a fixed full-height door or a fixed drawer that matches the cabinet’s front.

If the cabinet is near a drop zone, remove the fixed door’s center panel and replace it with a chalkboard or whiteboard panel. The toe of the base cabinets is flush against the cabinet’s side.
- When a fixed door is installed on the end of an in-set-styled cabinet, it matches the front door and has a dark panel behind it inside to prevent light from shining through. So, installing a fixed door is an option if you are concerned about how to finish inside cabinets.
- A fixed door on the cabinet ends is the same as a working door installed on the cabinets. However, a normal door is functional and has tiny bumper pads.
- An open toe comes standard when this option is selected. If it’s a base cabinet, it’s also good to specify full-depth shelves to finish the inside of the cabinets smoothly.
6 Ideal Ways to Finish Cabinet Ends Easily
By extending the style of your fascia over the rest of the cabinet, the addition of end panels offers your kitchen cabinets a clean look. They’re simple to assemble and add a nice touch to any room. This is exactly what you want to know about finishing cabinet ends.
Painting kitchen cabinets is one way to give a smooth finish to the cabinets by replacing the basic white end panel with the colored end panel. Whether it’s a renovation or simple budgeted remodeling for the kitchen, buying RTA (ready-to-assemble) kitchen cabinets, or building them yourself with a proper cabinet layout guide, you still need to focus on finishing.
The tiniest touches make the largest impact on how professional your kitchen cabinet looks, which many homeowners are unaware of. This guide will highlight the various options to finish cabinet ends, especially when you install cabinets yourself. Luckily! You can end a cabinet in several ways using your own creativity and DIY skills.
5 Common Types of Cabinet Finish to Choose
When installing new cabinets or refinishing them, you have to understand the overall appeal you are aiming for in the kitchen. Different types of cabinet finish are used according to the kitchen size. You may not want to overdo or undo the finishing without proper consultation. However below are some of the most common types of cabinet finish ends you can choose from.
1. Painted Finish
Nothing is easier than painting kitchen cabinets to maintain your budget and revamping the kitchen layout. You can choose various robust range of colors to paint such as fresh snow, sugar, cameo, primrose, driftwood, onyx, and so on. You can remodel a small galley kitchen by using a matte finish or choose a semi-gloss paint. It will depend on the kitchen size.
2. Stained Finish
If you want to keep the natural beauty of wood cabinets, a stained finish is the right choice. It is highly affordable and easy to maintain. Because it is made with natural pigments and dyes, it is a durable water-based solution for cabinet finish.
3. Glazed Finish
Whether you choose a paint or stained cabinet finish, glazing them will add a more antique look to the natural cabinetry. It’s all about highlighting the design, texture, and overall details of the cabinet design especially if cabinets have intricate carvings.
4. Melamine Finish
These types of cabinet finishes are made with heating-sealing thermally fused melamine resin (TFM). Because they are highly affordable, homeowners have tons of choices for melamine kitchen cabinets such as regular melamine or textured melamine, etc.
5. Lacquer Finish
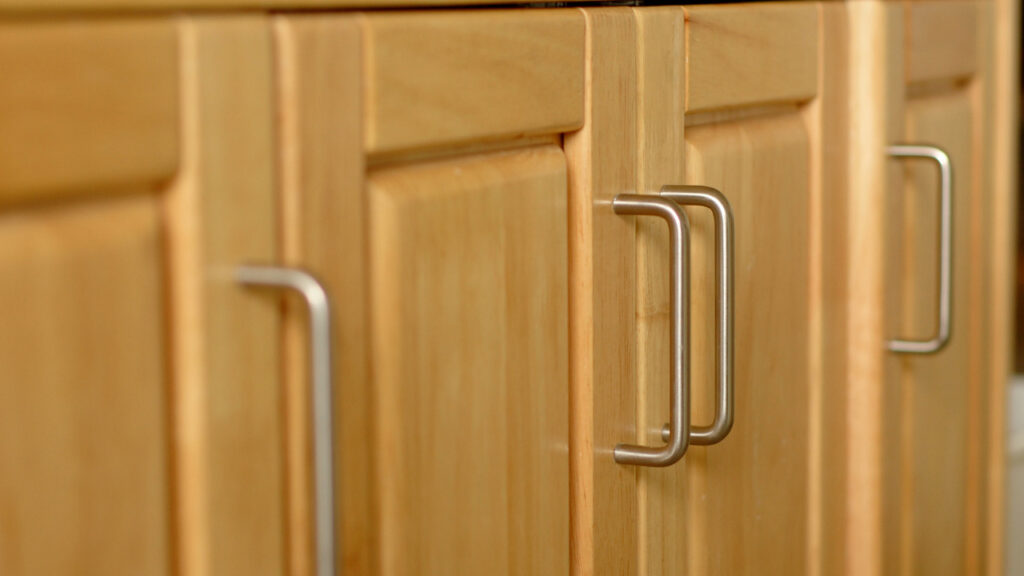
A handleless hardware for kitchen cabinets usually has a lacquer finish look. It is a solvent-based paint for a more rigid synthetic coating. It is either sprayed or brushed multiple times. They can also have a matte or glossy look.
6 Super Professional Ways to Finish Cabinet Ends Yourself
There are several ways to finish the cabinet ends. The basic purpose of finishing the cabinet ends is to give your kitchen a smooth and sleek look, especially while working on a kitchen remodeling project.
So, let’s discuss a few creative ways to finish cabinet ends.
1) Non-Flush Finished Ends

A non-flush dead end is the simplest and most cost-effective option for different types of kitchen cabinets. On the side, there will be a 14″ scribe.
Some contractors prefer to use this scribe on the sides of cabinets that will be butted against a wall since it allows them to shave up to 14 inches off the cabinet if the walls aren’t completely square.
The sort of finished cabinet treatment you select for the ends of your kitchen cabinets can significantly impact the appearance of your freshly remodeled kitchen.
2) Flush Finished Ends
Because the side of the cabinet is flush with the outer edge of the face frame, there is no scribe on the side of a flush-finished end. On the side of the cabinet, you can see the seam where the two parts meet.
3) Measured Finished Cabinet Ends

A measured dead end is similar to a flush finished end, except that the seam where the side of the cabinet meets the face frame of the cabinet is at the corner. Thus there is no visible seam. This is a wonderful solution for cabinet corners that stand out from the rest of the cabinetry or cabinets that are visible from the side.
4) Decorative Ends and Moldings
On the side of the cabinet, a decorative end places a panel that mimics the door design. If you have a metered door style, it is created with mortise and tenon construction to be close but not an identical door reproduction.

Decorative cabinet molding is another technique to consider if you are looking o finish cabinet ends and add detail to your cabinetry. In most kitchen installations, two-piece crown molding is employed. It gives a sleek and finished appearance for timeless kitchen cabinets.
Use an under-cabinet crown or light rail molding to add a decorative feature for base cabinets. It can also conceal under-cabinet lighting and any electrical outlet strips that may be placed.
5) Finish Cabinet Ends by Fixing a Door
This final game adds a real door to the side of your cabinet, but only as decoration. This could be a fixed full-height door or a fixed drawer that matches the cabinet’s front. Some of the best cabinet doors for the kitchen will vary according to their level of functionality, budget, and color.
If the cabinet is near a drop zone, remove the fixed door’s center panel and replace it with a chalkboard or whiteboard panel. The toe of the base cabinets is flush against the cabinet’s side.
- When a fixed door is installed on the end of an in-set-styled cabinet, it matches the front door and has a dark panel behind it inside to prevent light from shining through. So, installing a fixed door is an option if you are concerned about how to finish inside cabinets.
- A fixed door on the cabinet ends is the same as a working door installed on the cabinets. However, a normal door is functional and has tiny bumper pads.
- An open toe comes standard when this option is selected. If you are about to install base cabinets, it’s also good to specify full-depth shelves to finish the inside of the cabinets smoothly.
6) Finish the Top of the Kitchen Cabinets
After finishing the ends, inside, and base of your cabinets, the next concern is how to finish the top of the kitchen cabinets. Most DIYers find this a little bit complicated but there are also several ways to finish the top of cabinets.
You can finish the top of the cabinets by lowering the wall-mounted cabinets from the counter. This way, there will be more space to deal with the overall look of your cabinets. However, the main drawback of lowering the top cabinets is the improper alignment of the cabinets.
Moreover, you may also need to install decorative trim or molding to cover the gaps after lowering the top cabinets. Lowering the cabinets is not a good decision for glass cabinets. Simply put, you can lower the top of cabinets for finishing, but it will also increase your average kitchen remodel cost.
Modernize Kitchen Cabinets with the Right Finish
You can modernize the living space by giving your kitchen a statement look with a side or cabinet ends modification. However, don’t forget about your long-term goals. Start by determining if your clad-on panel will merely cover the height of the cabinet’s end or if you’ll also need to account for the height of any cornice or pelmets above and below.
DIYers can consider encircling the corner of an end cabinet with a 2-sided column or turned post to all these end treatments to the cabinet itself. Many discussed kitchen cabinet ending ways will be predicated on sightlines while searching and planning how to finish cabinet ends.